
How to Get Started with the CalendarApp in 3 Simple Steps
If you’re new to the CalendarApp, this guide walks you through the essential steps to get started: create your business, train the AI assistant to sound like you, and set up events clients can book. All from one place.
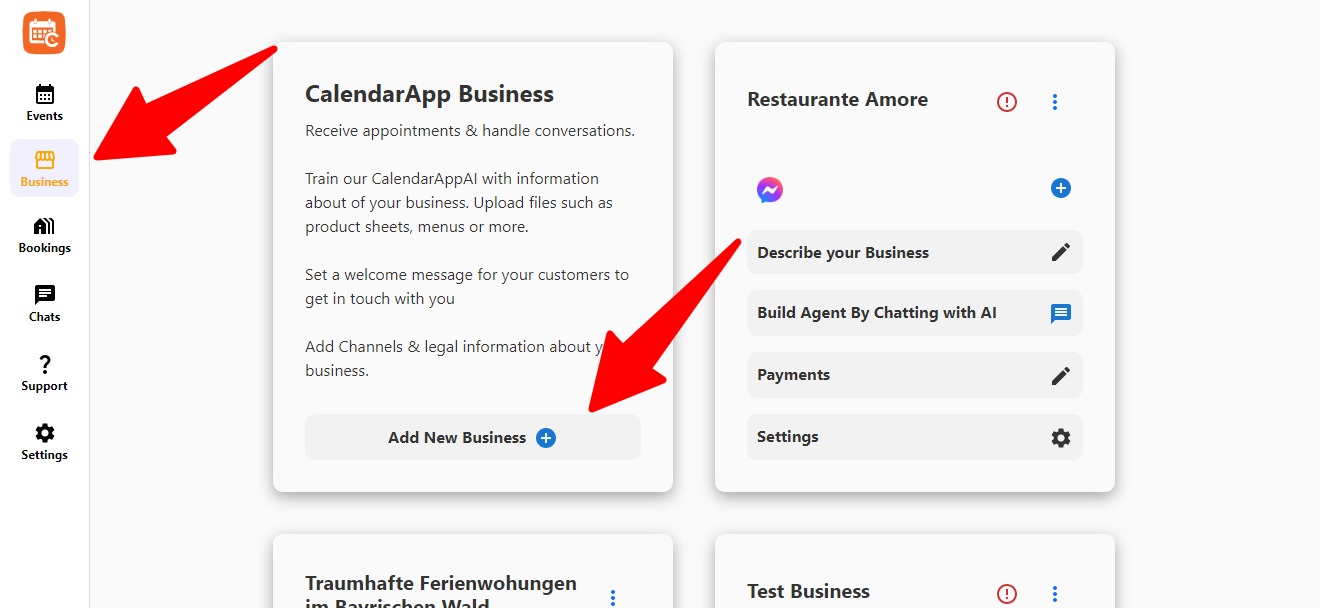
Step 1: Create Your CalendarApp Business
Head to Business section and click +Add New Business.
- Choose a name: This is just for you. Clients won’t see it.
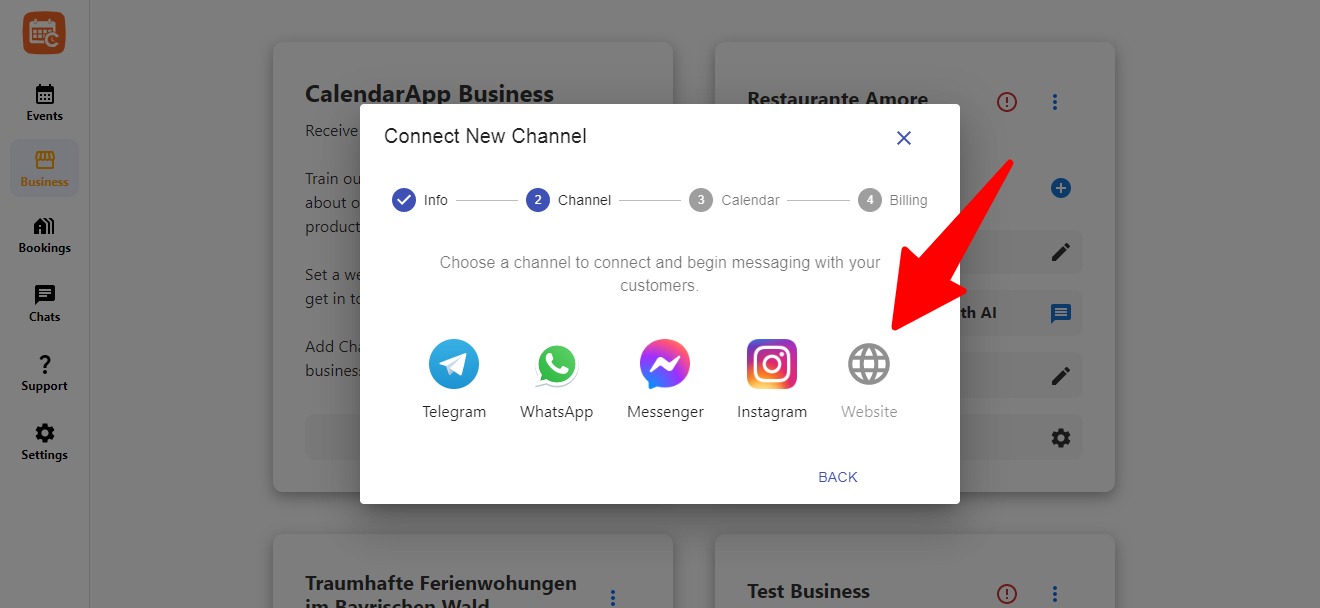
- Select a channel: Telegram, WhatsApp, Instagram, Messenger.
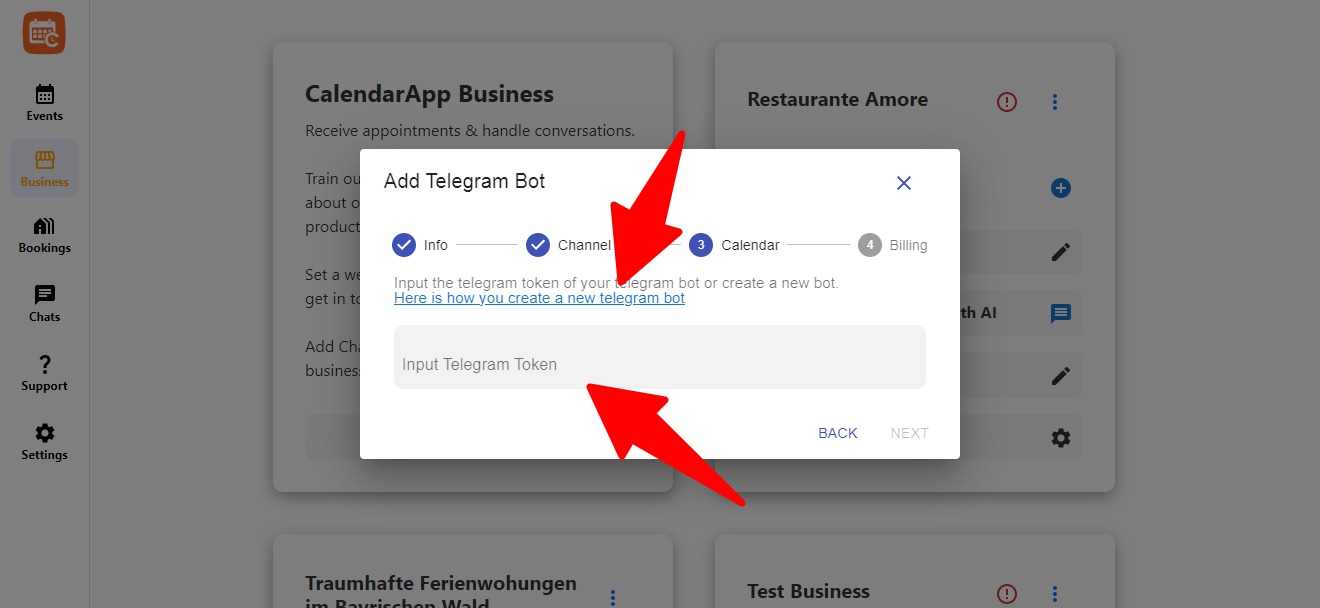
Connect Telegram
- Create a Telegram bot via BotFather
- Copy the token
- Paste it into the required field
- Click “Next”
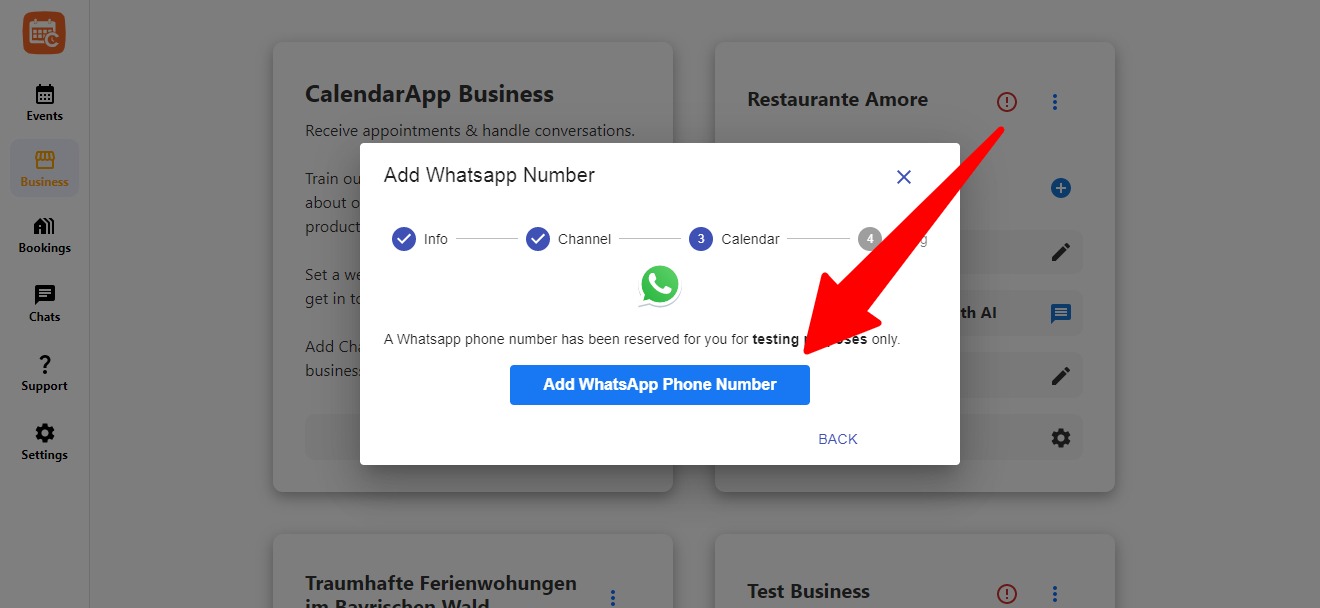
Connect WhatsApp
You have two options:
- Use a phone number with WhatsApp Business App that has been active for a while (at least 1 month with proper conversations)
- Or request a new number via WhatsApp Cloud. You may use a dedicated CalendarApp number only for testing
Note: A brand-new number won’t work unless it’s used on the WhatsApp Business App beforehand.
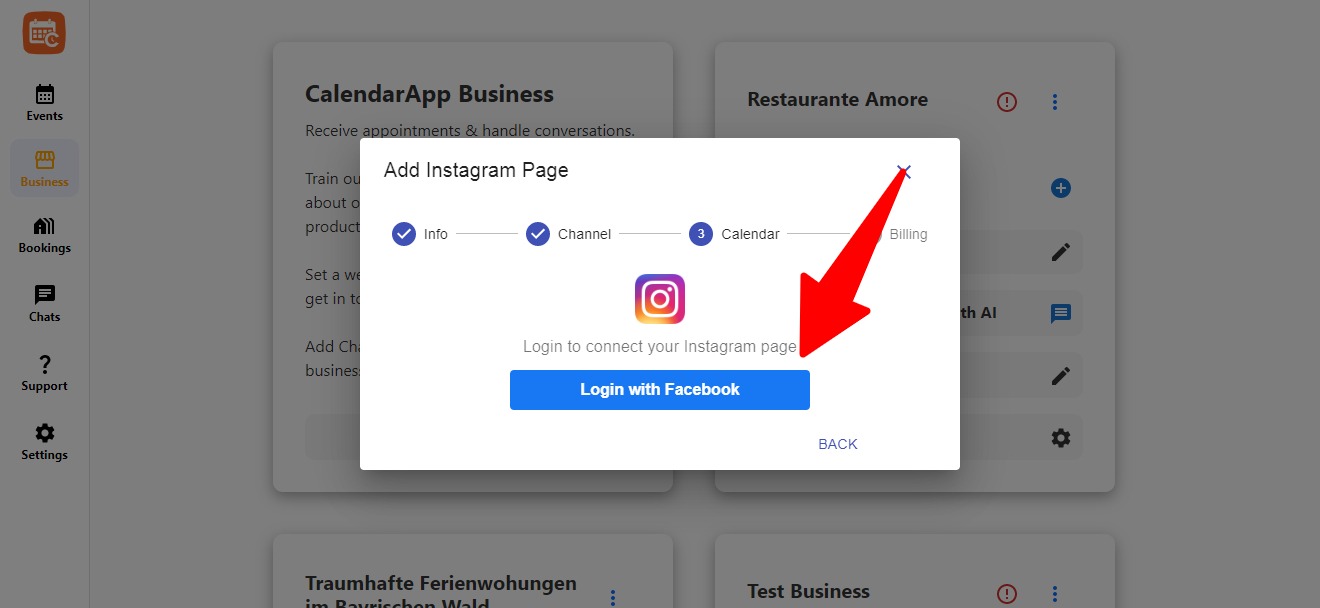
Connect Instagram
Click Login with Facebook and choose your Instagram business page.
- You must be an admin of the Facebook page
- Allow the necessary permissions
- Select your business profile
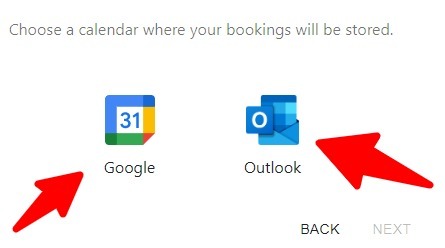
Connect Google or Outlook Calendar
Choose a calendar provider:
- Google Calendar
- Outlook
You’ll be redirected to authenticate. Grant permission to manage your availability.
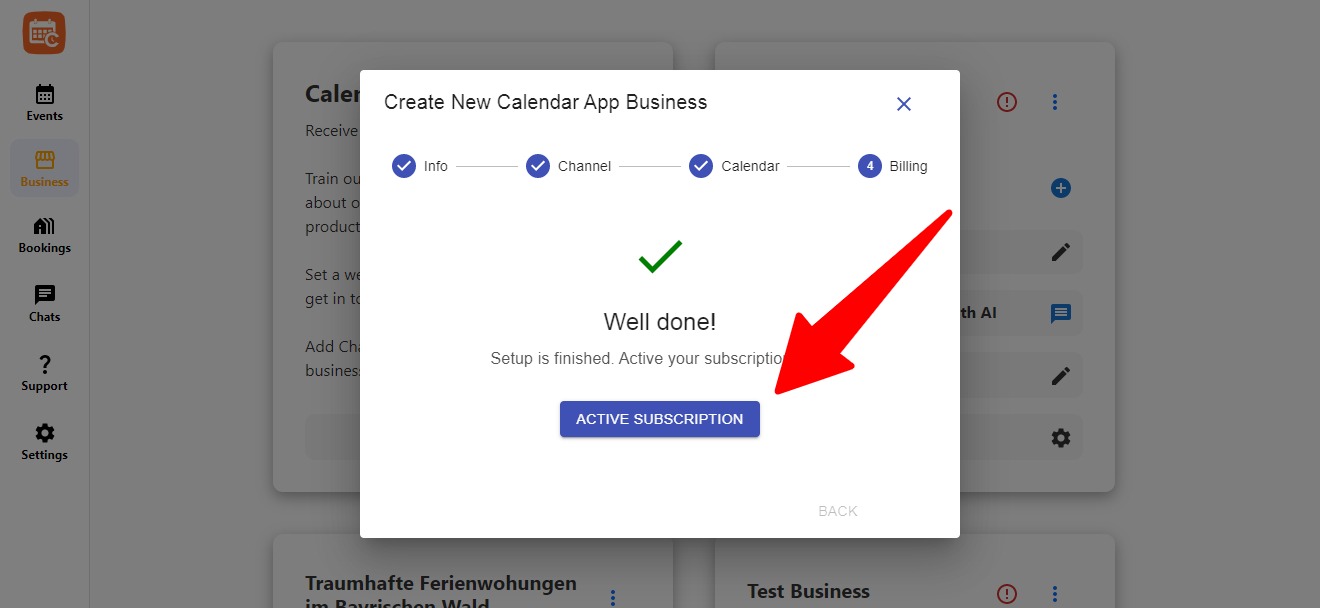
Start Free or Activate a Subscription
New users get a 14-day free trial. To continue or activate more businesses, click “Activate Subscription.”
Step 2: Train Your AI to Know Your Business
CalendarApp’s AI learns about your business and adopts your brand voice to reply to customer messages. It makes scheduling personal.
To begin, go to your business and click “Describe Your Business”.
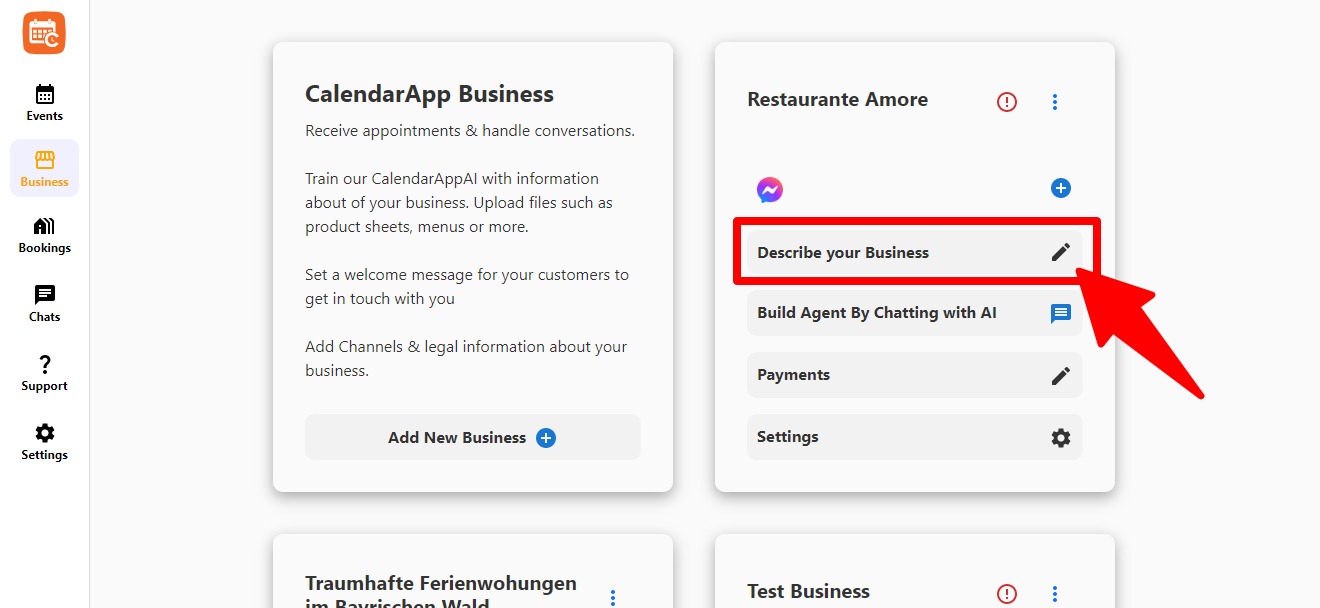
Here you can edit details like:
- Business Identity & Purpose
- Basic Information (address, phone, email)
- Services and Packages
- Frequently Asked Questions
- and much more
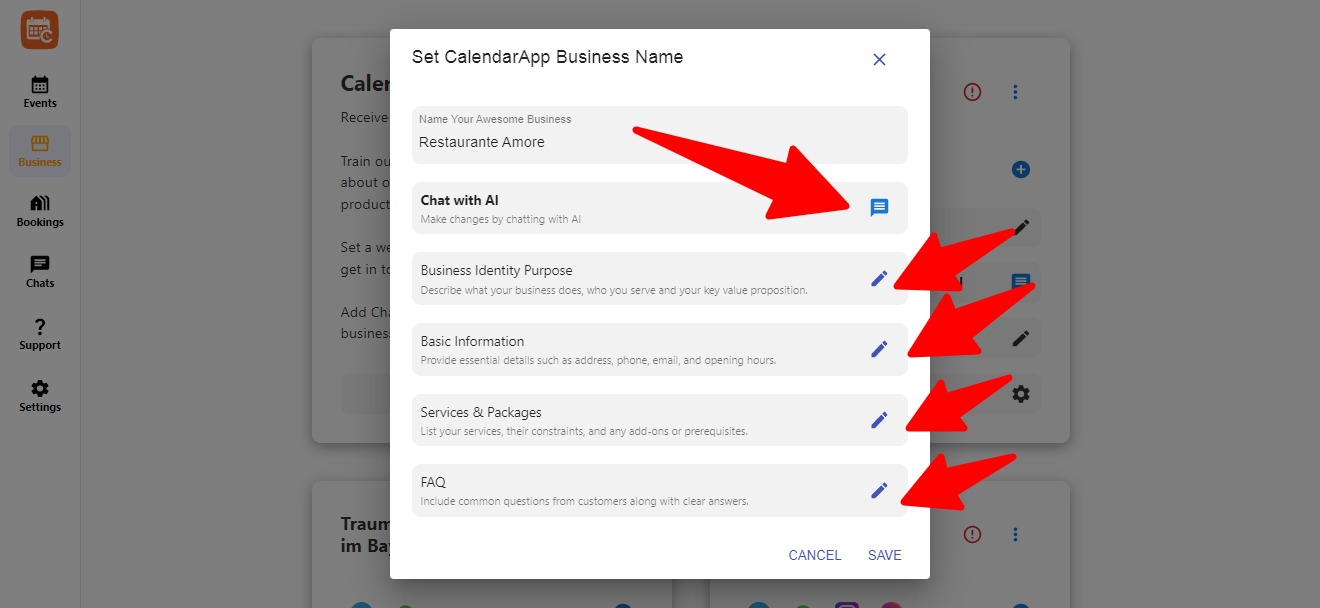
Or Just Chat With the AI
Use the “Chat With AI” button to provide all this info in a friendly conversation. The AI automatically fills the right fields.
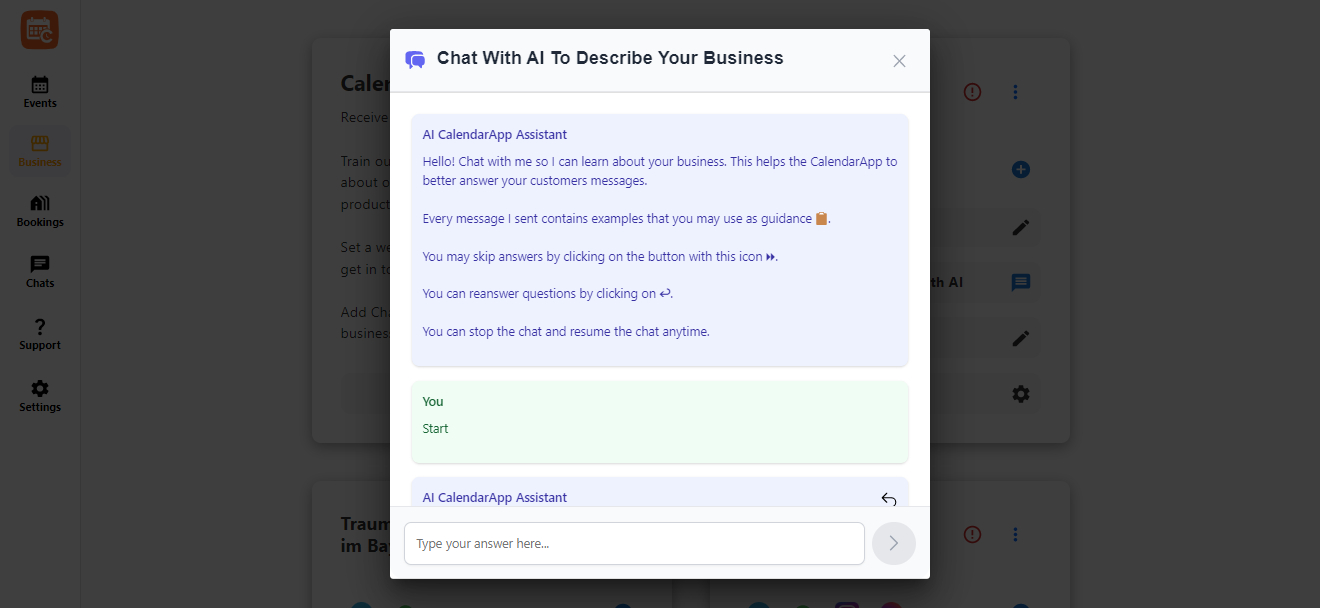
- You can skip questions and return later
- You can re-answer anything
- You can fine-tune details any time
Step 3: Create & Edit Events
Each CalendarApp Business can have multiple events. One for each service you offer (e.g. pedicure, consultation,…).
Go to the Events tab and choose how to create between these 2 options:
- Use AI Chat to build a new event from scratch
- Pick a Template: Classic 1-on-1 Event, Accommodation Booking or Restaurant Table Booking

Customize Your Event
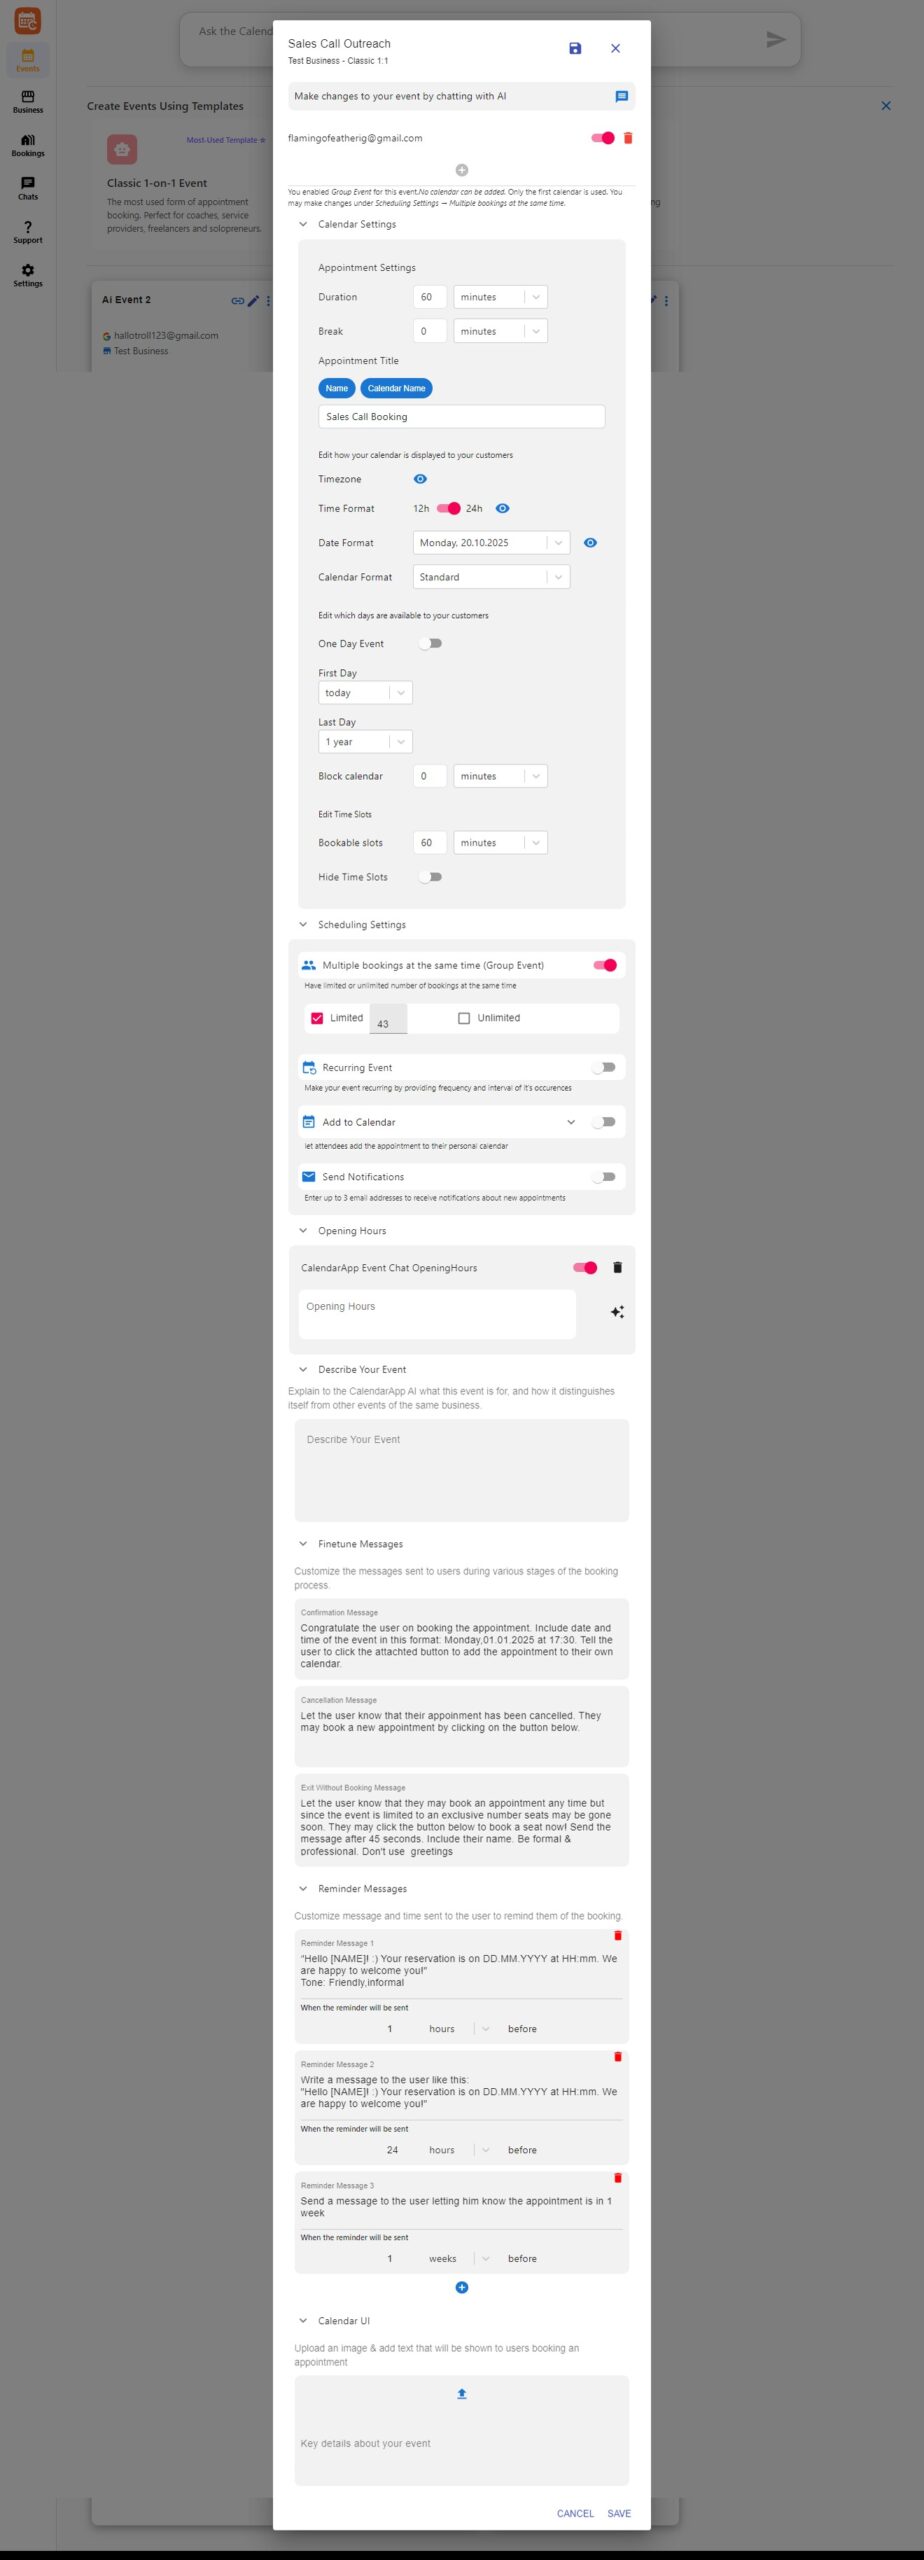
Here’s what you can change:
- Event Name & Duration
- Booking Availability (time slots, limits, recurring)
- Confirmation & Reminder Messages
- UI & Booking Page Image
You can even enable:
- Group Bookings
- Blocked last-minute appointments
- Custom messages if a user exits without booking
- and many other settings
And of course, you can update everything later – via form or simply by chatting with the AI.
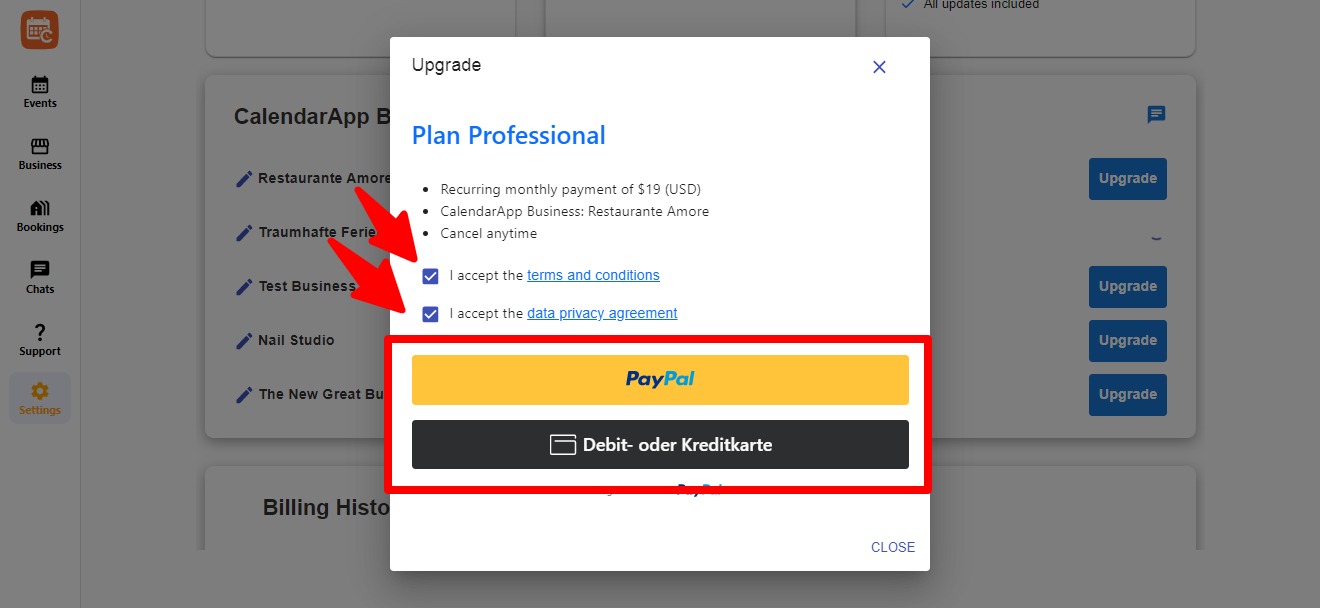
Pricing & Subscriptions
Access billing under the Settings menu. All plans include support via chat, call, and video.
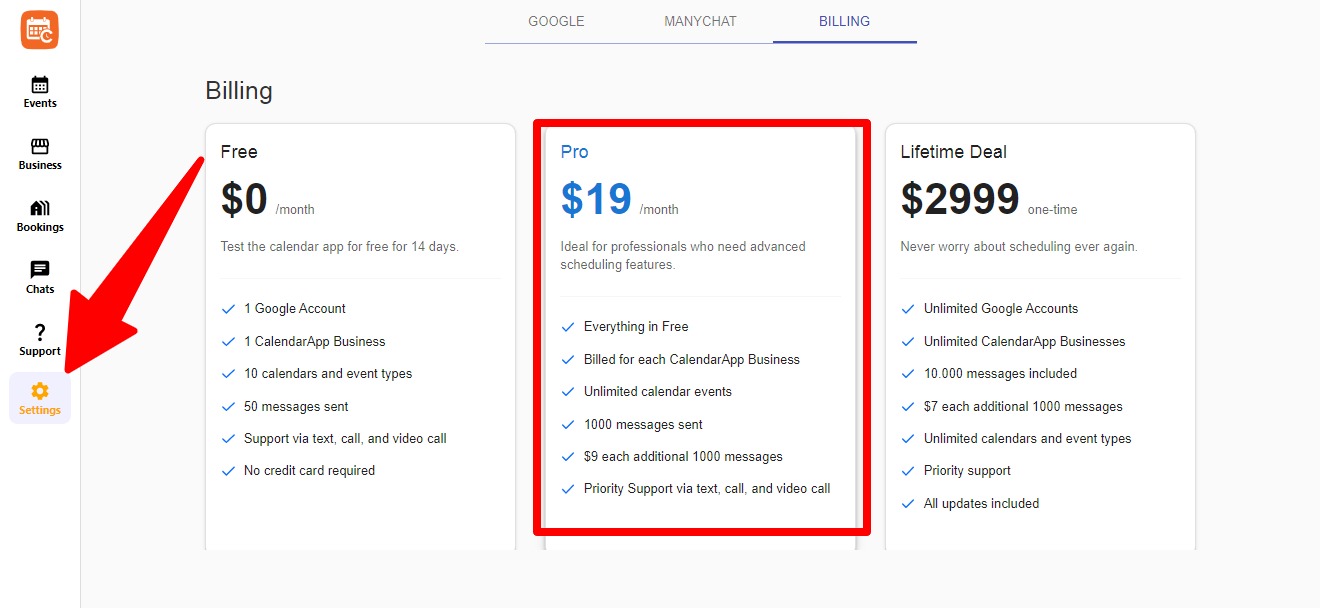
Plans
- Free: 14-day trial, 1 business, 50 messages
- Pro ($19/month): 1 business, 1000 messages, priority support
- Lifetime ($2999): All features, one-time payment
You can upgrade any business individually using PayPal or credit card.
Need help? Just click the message icon on the right to reach support.