How I 3× My Nail Studio Bookings by Automating WhatsApp and Instagram with CalendarApp
Hi, I’m Chloe. I run a small but thriving nail studio called Aesthetic Nails by Chloe. If you’re anything like me, you love your craft, you adore your clients, but you’re completely exhausted from answering every DM, confirming appointments, rescheduling bookings, and hoping people actually show up.
That was my life for a long time. Then I found CalendarApp.
This post is for you if you’re trying to grow your studio but don’t have time to answer 50 messages a day. I’m going to walk you through every step of how I automated my WhatsApp and Instagram bookings using CalendarApp. I’ll share screenshots, explain every click I made, and show you exactly how you can do the same.
Let’s begin.
Table of Contents
- Step 1: Sign Up and Create Your CalendarApp Business
- Step 2: Connect Instagram
- Step 3: Connect WhatsApp
- Step 4: Add Google Calendar
- Step 5: Training My AI Assistant
- Step 6: Adjusting My First Event – Pedicure
- Step 7: Creating Opening Hours
- Step 8: Booking Flow on WhatsApp
- Step 9: Rescheduling an Appointment
- Step 10: How the Chat Looks From My Side
- Step 11: What Shows Up in My Google Calendar
Step 1: Sign Up and Create Your CalendarApp Business
The very first step is to sign up for CalendarApp. After that, you create your CalendarApp business.
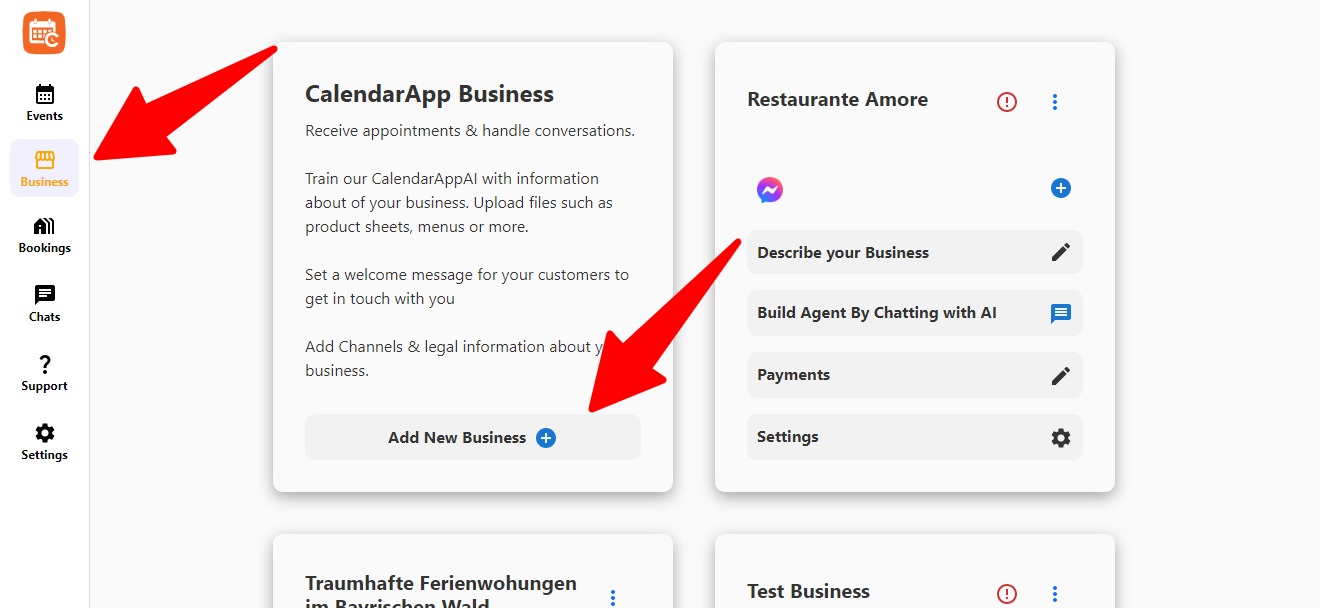
- Navigate to Business
- Click on + Add New Business
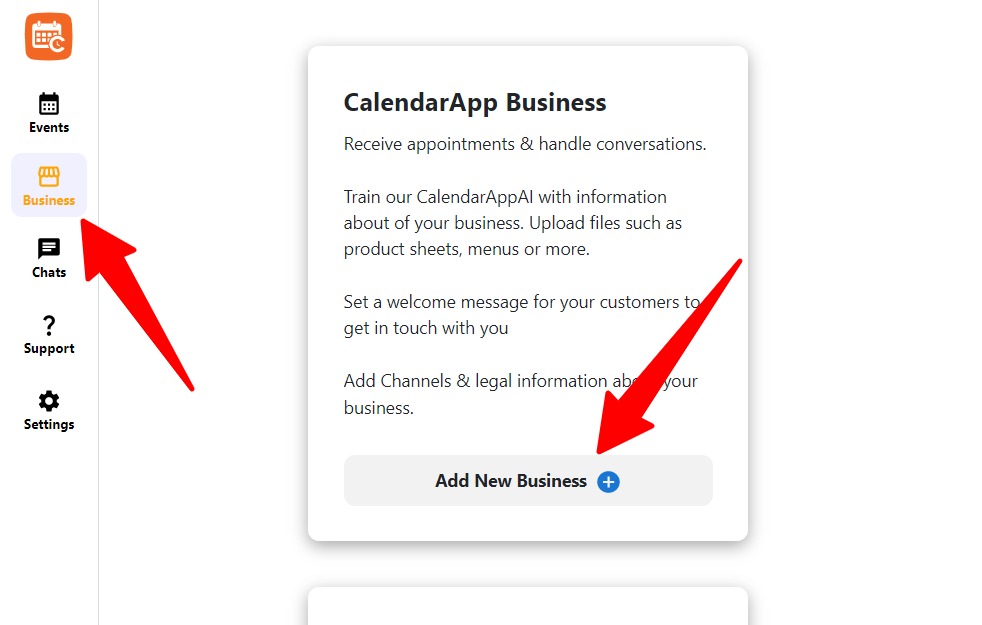
- Input the name of your CalendarApp Business. The name is for your reference. You customers will not see it. You may change it later

You simply enter the name you want to give your business. That’s the starting point for everything else.
Step 2: Connect Instagram
Now it was time to connect my messaging channels. Since most of my clients reach me through Instagram DMs or WhatsApp, linking both was essential.
There are 2 ways of connecting Instagram to your CalendarApp Business.
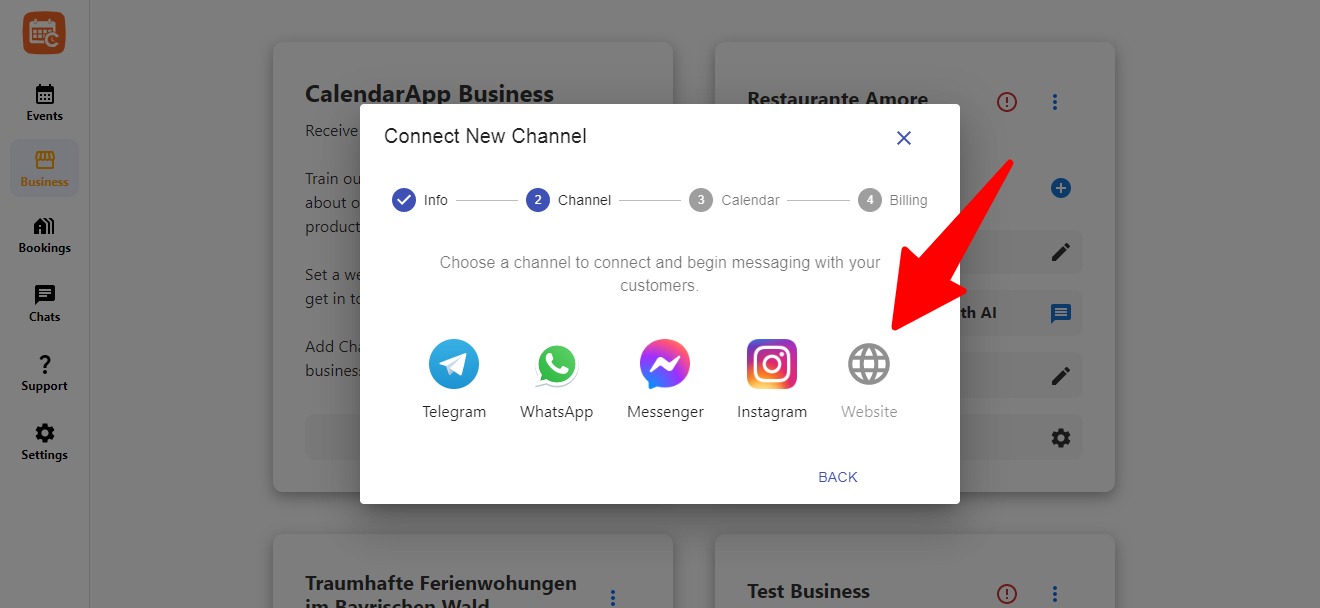
If you clicked Next on the previous step you are automatically shown possible channels to connect. In this case simply click on Instagram.
In case you navigated to www.calendar-app.de/business or clicked on Business in the navigation you are presented with your already exisitng businesses. Then:
- Click on + to add a new channel
- Select Instagram from the available options

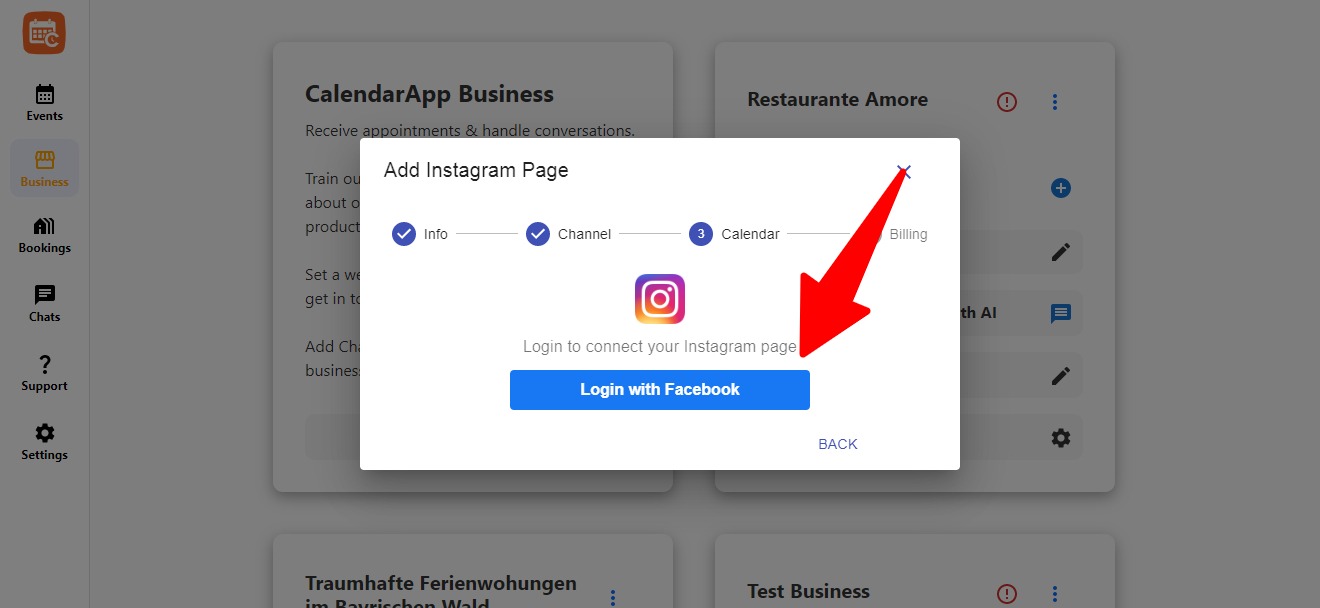
- Click the button to begin connecting your Instagram page
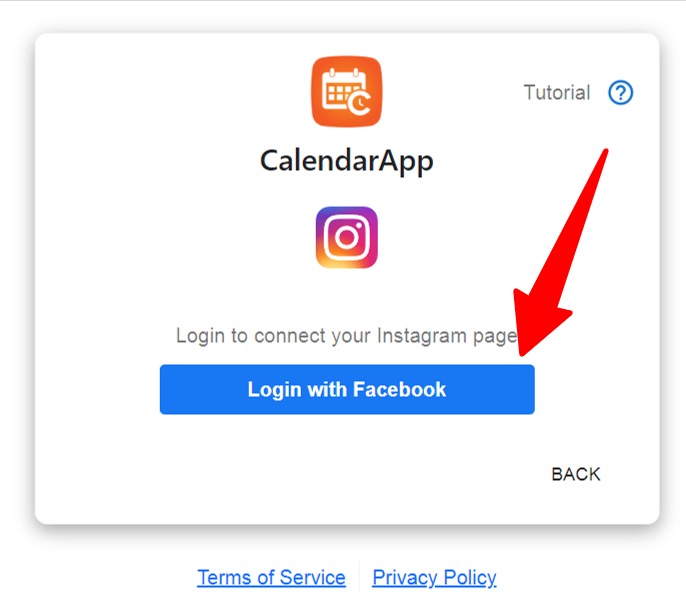
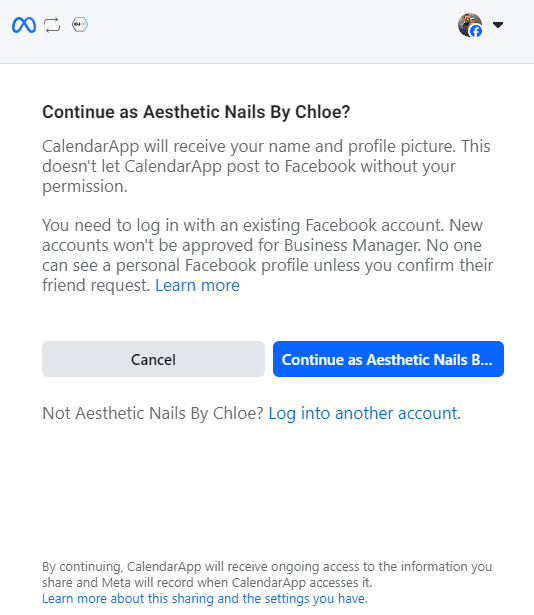
- A Facebook dialog will open. Go through the required permission screens
- Start by logging in with your Facebook Account. Important: the facebook account must have admin permissions on the page you want to connect to your CalendarApp Business

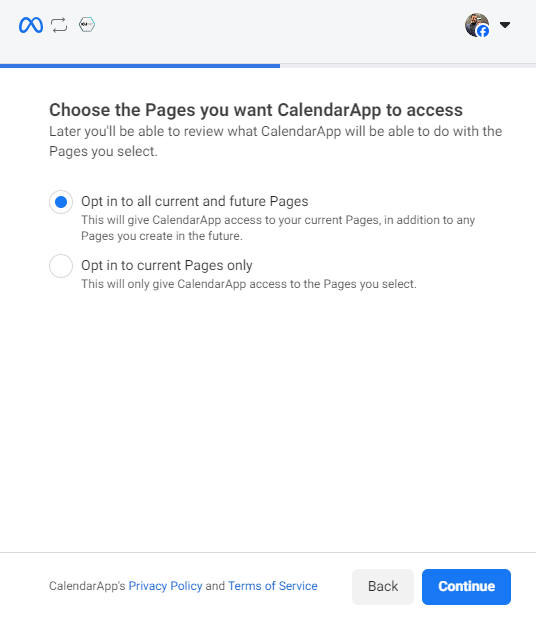
- Select Opt in to all current and future Instagram accounts
- then select Continue

- Select Opt in to all current and future pages
- Then click Continue
- Click on Save
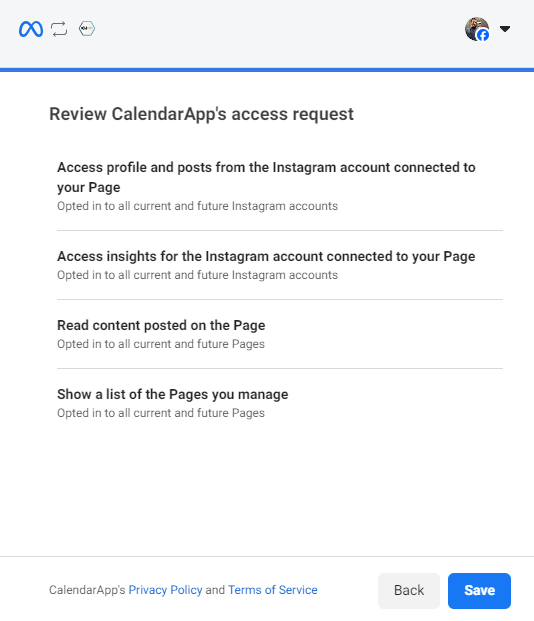
- Click on Got it

- Choose the Instagram page you want to link
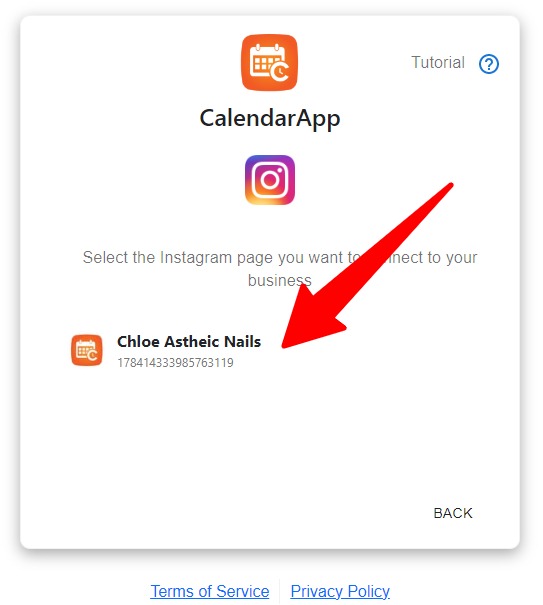
- Confirm the connection by clicking on Submit
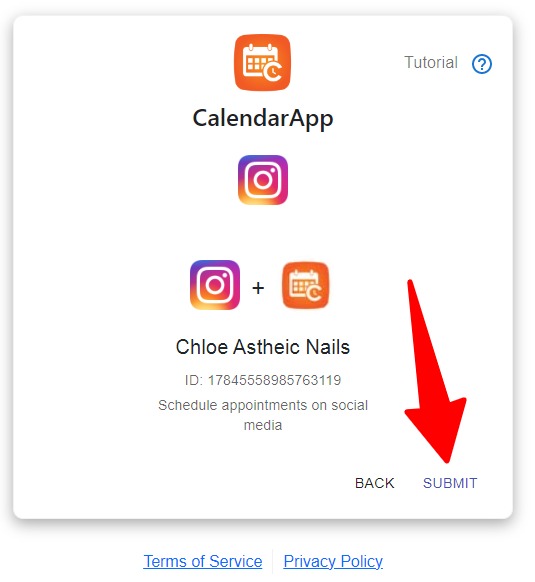
- Well done! Your Instagram page has been successfully connected
Step 3: Connect WhatsApp
Now it’s time to connect Whatsapp to your CalendarApp Business.
Before we start you want to consider these 2 options:
1. Use your current Whatsapp phone number.
2. Get a new Whatsapp phone number.
Current Whatsapp Phone Number
If you want coexistence, you must use the WhatsApp Business app. During setup you scan a code and we sync your messages. After that you can keep using the WhatsApp Business app for one to one chats, while the Calendarapp helps you send messages at scale.
Coexistence does not work if your number is on the regular WhatsApp Messenger. It only works with the WhatsApp Business app.
New Whatsapp Phone Number
You may use or own phone number or get a phone number from Whatsapp
If you use your own number, you verify it by SMS or phone call.
If you get a phone number from WhatsApp, it will work with limited features.
If you choose new number, messages go through our system and replies appear in our dedicated chat interface. With a new number, you answer manually inside our chat, not in the WhatsApp app.
Now let’s get started:
Follow these simple steps to add Whatsapp to your CalendarApp Business:
- Naviagte to Business
- Find the CalendarApp you want to add Whatsapp to
- Click on +
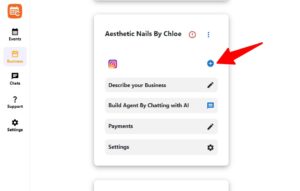
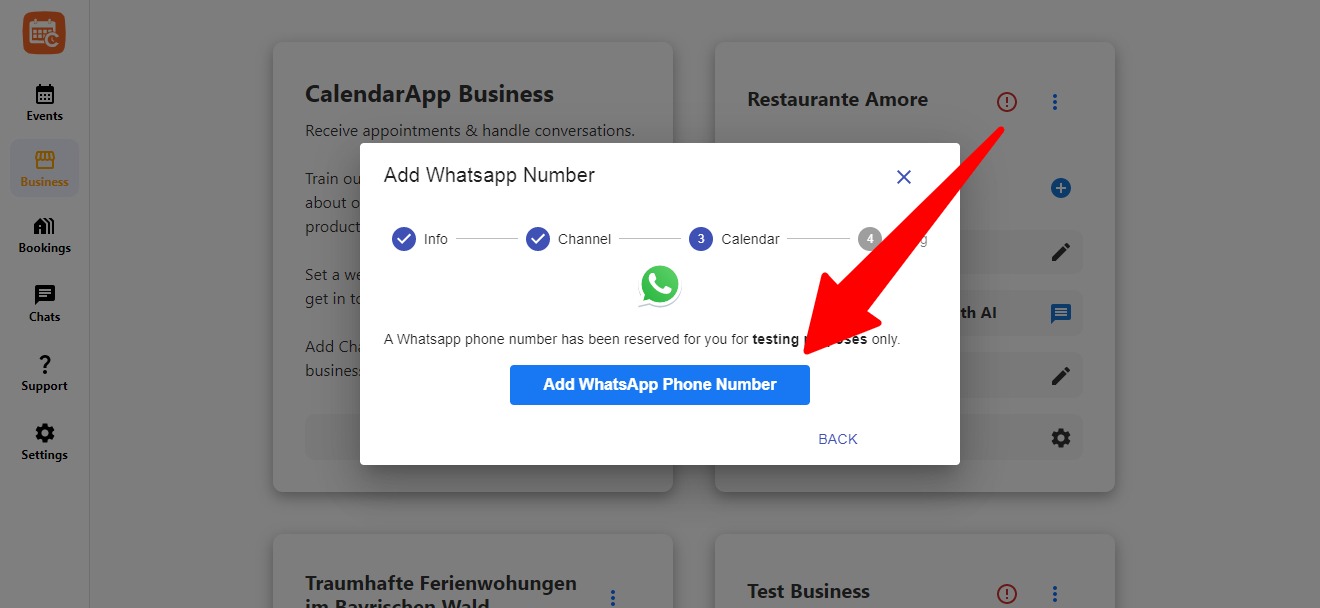
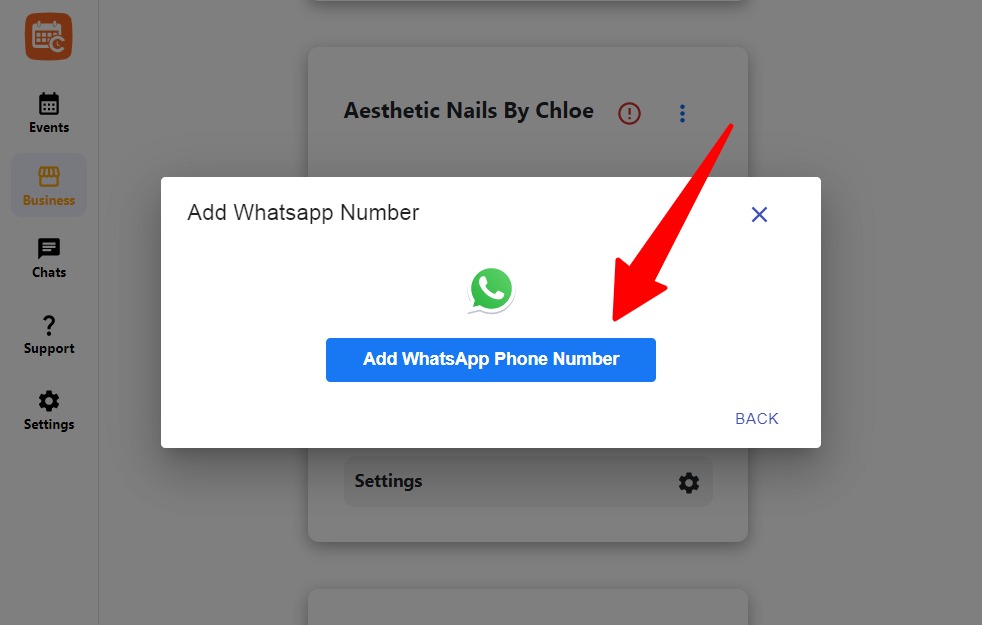
- Start the WhatsApp connecting process by click on Add Whatsapp Phone Number
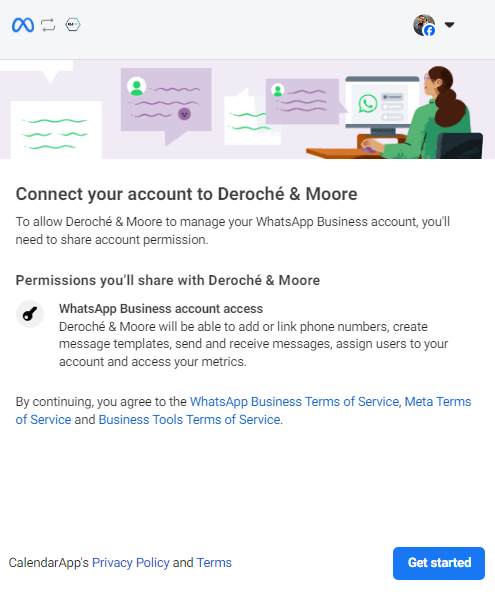
- Log in via Facebook to proceed with WhatsApp Business connection
- Click get started
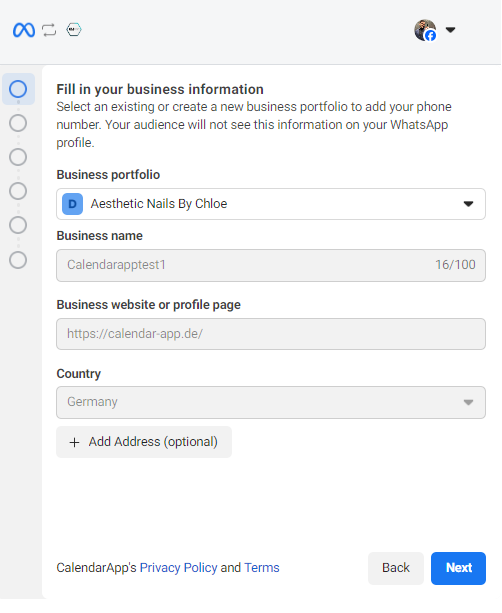
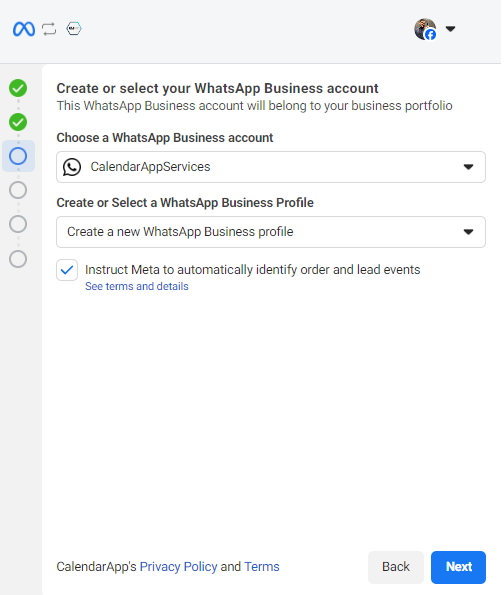
- Select your Whatsapp business profile or create a new one
- Then click Next
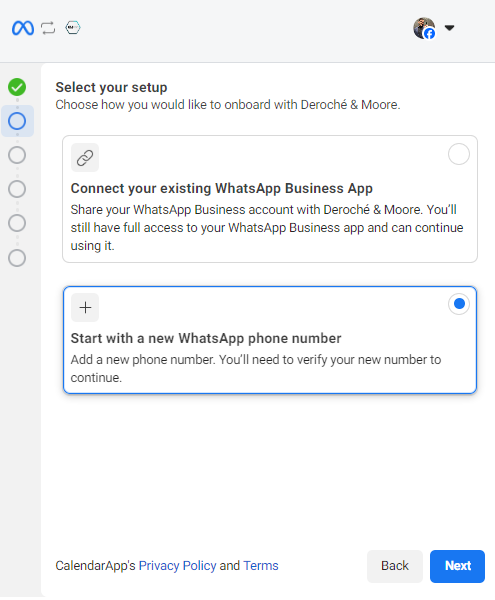
- Choose to connect an existing number or start with a new one

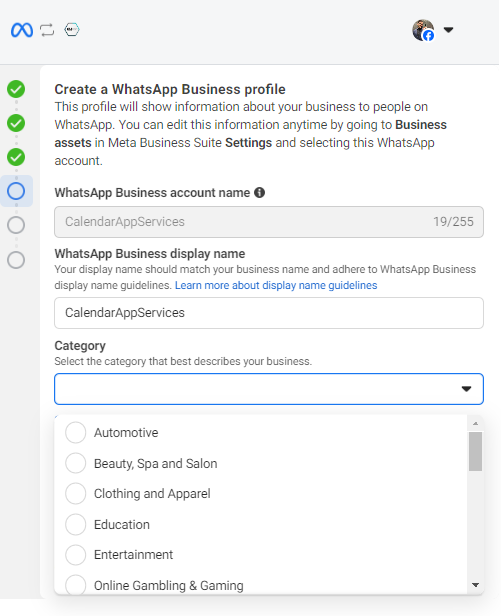
- Proceed to set up your WhatsApp Business profile
- Select your business industry
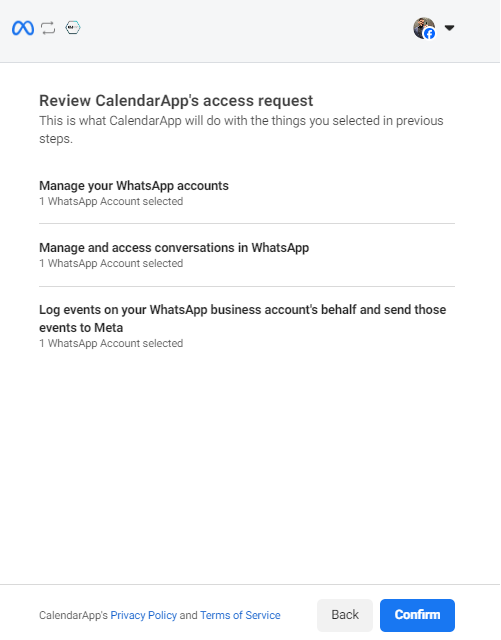
- Confirm the setup
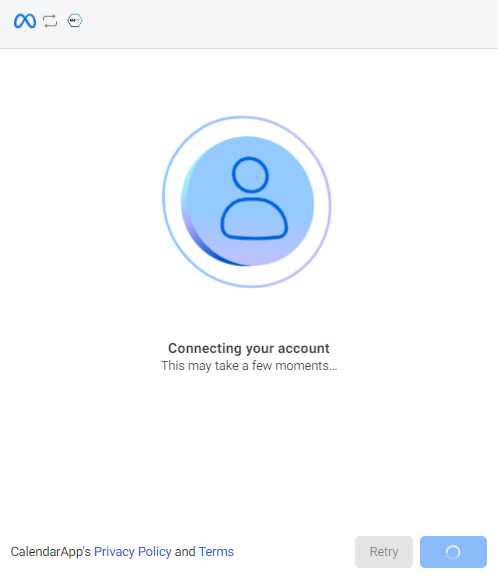
- Wait for your number to be added
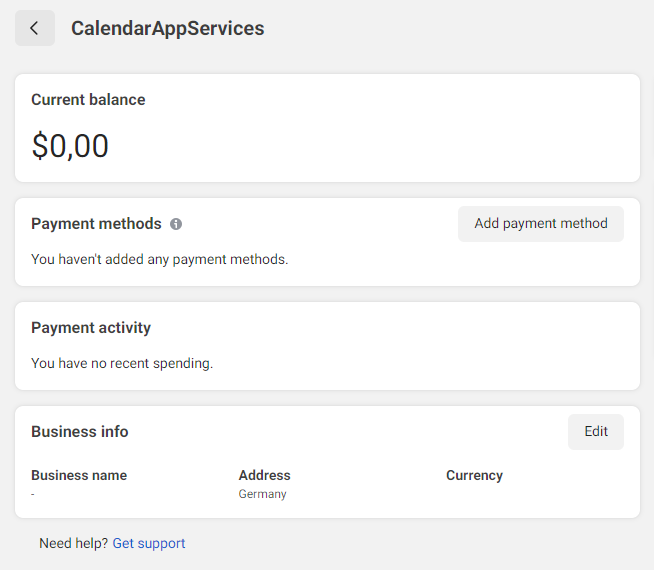
- not required but recommended: Add Payment method
why? WhatsApp charges businesses for certain message types. Without a valid payment method, messages that cost money may be blocked, which can break your customer conversations and automations.
- Click Add Payment Method
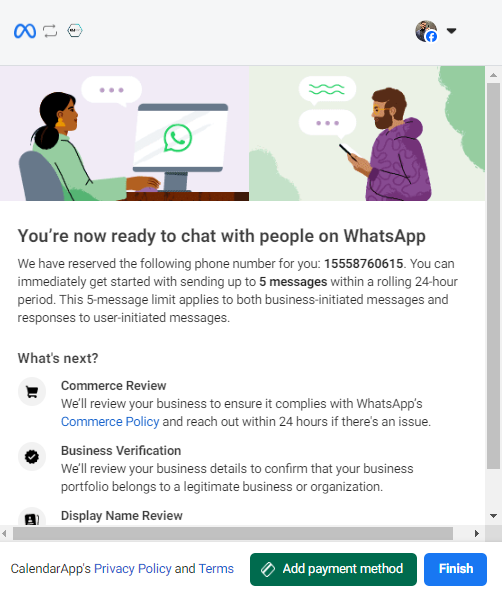
- after adding a payment method you may close the dialog. Your Whatsapp number has been successfully added to your CalendarApp Business
![]()
Your Whatsapp Number has been addedd successfully
Step 4: Add Google Calendar
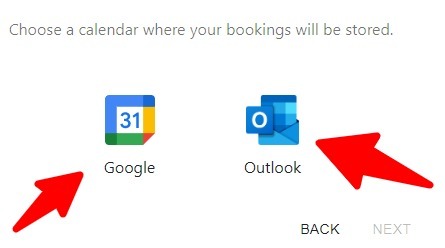
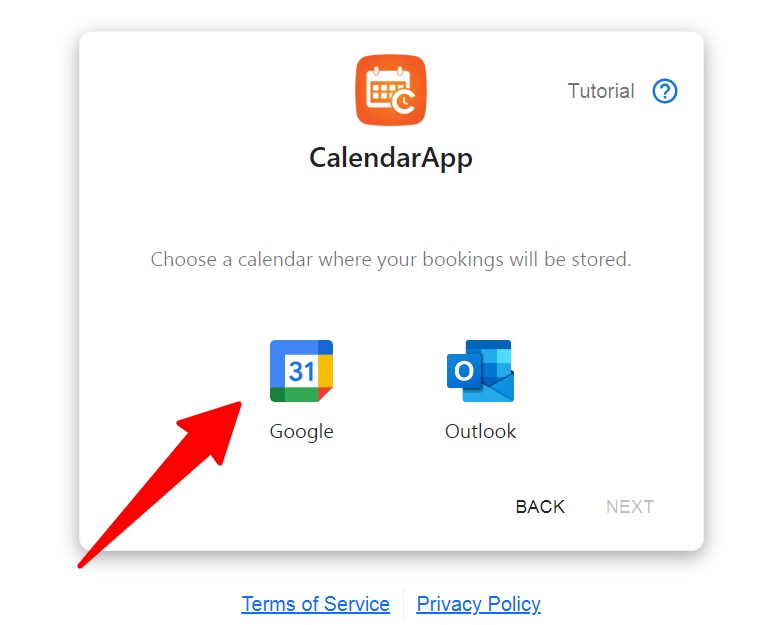
We now select and add the calendar where our bookings are going to be stored. I choose the Google Calendar. You have to ways of adding your Google Calendar:
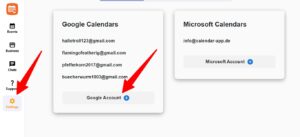
- you see the option right away after connecting your Channel or
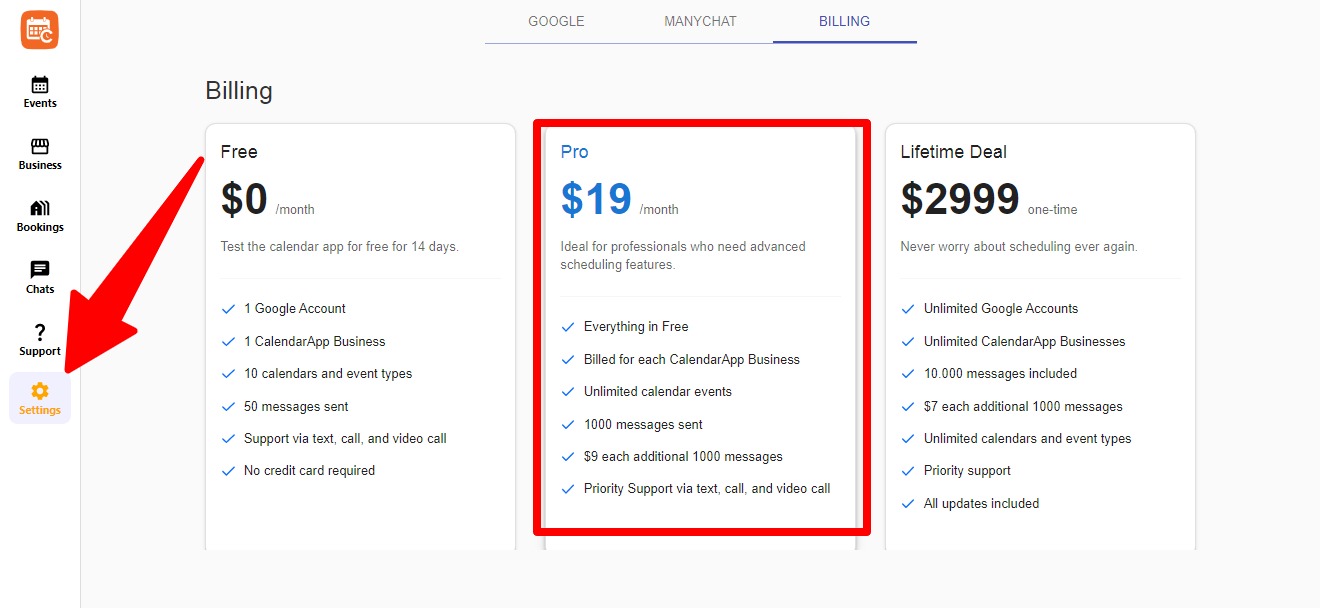
- you navigate to Settings then click on + Google Account
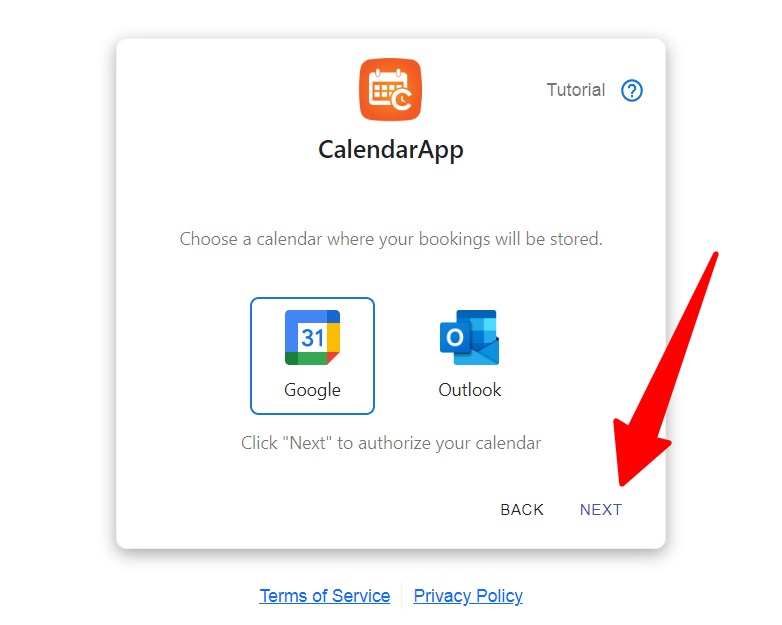
- From the calendar connection view, select Google (Option 1)
- Click next
- Option 2
- Select your Google account

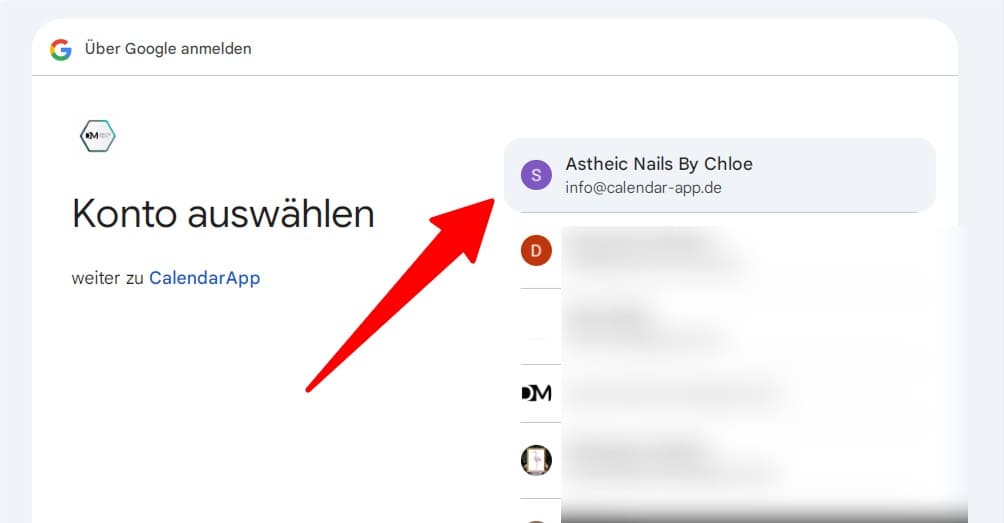
- Click continue to complete the integration
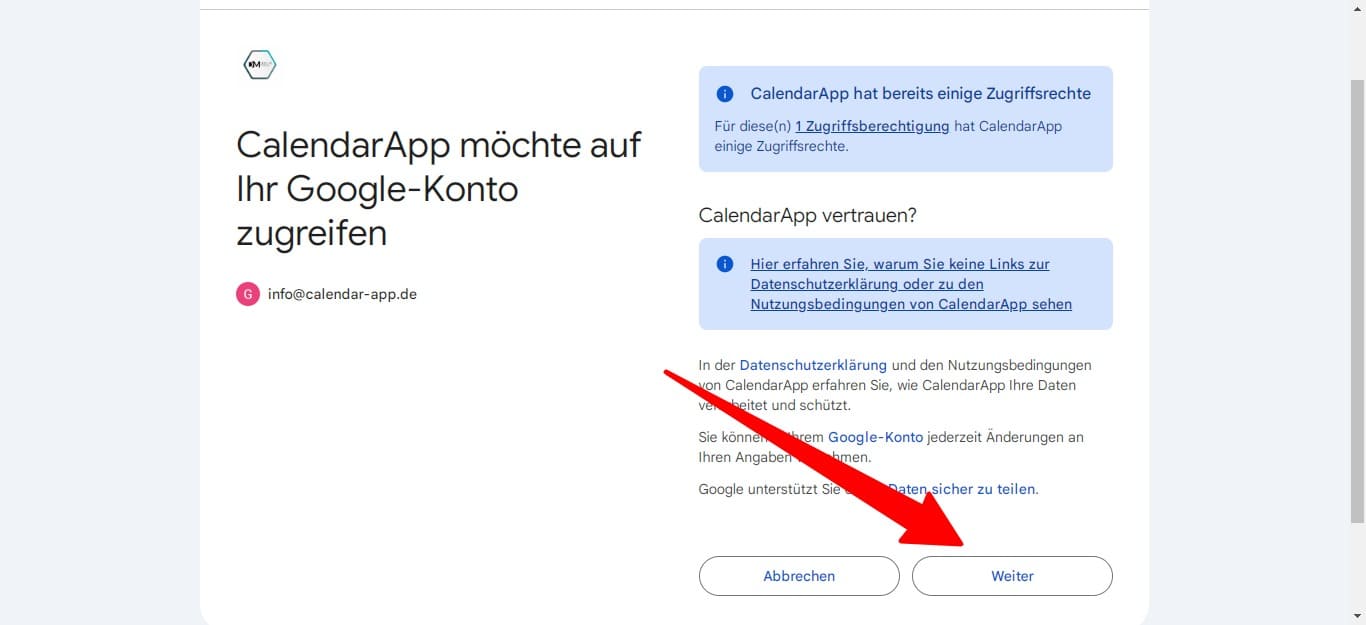
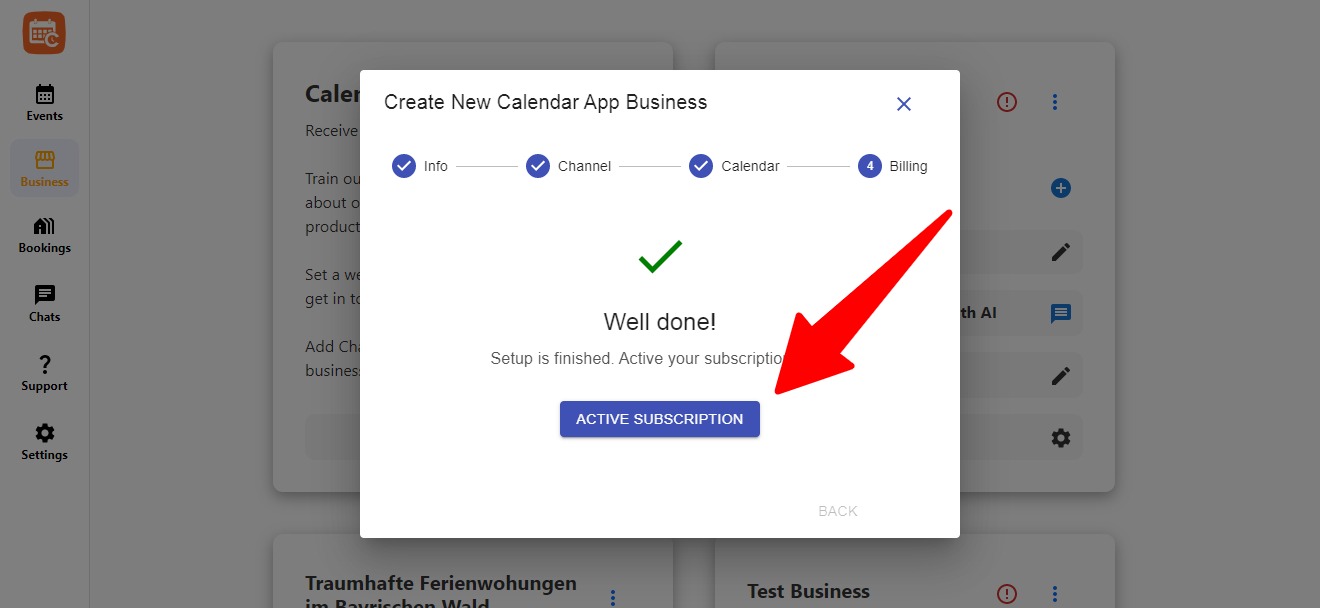
Well done! Your Google Account has been connected successfully!
Step 5: Training My AI Assistant
The goal is to give the assistant enough context about the nail studio so it can answer like a real team member. Think of it as teaching a new receptionist who learns your voice, your rules, and your offer.
I went through a guided setup where I answered things like:
- How I greet clients
- What services I offer
- What tone to use
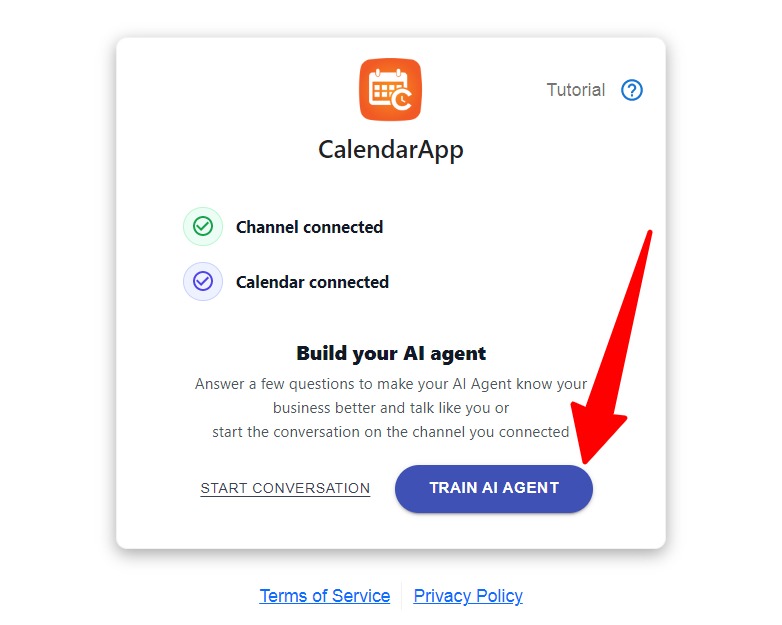
To train your CalendarApp AI Agent you have 3 options:
- you are prompted with the window to train the AI Agent
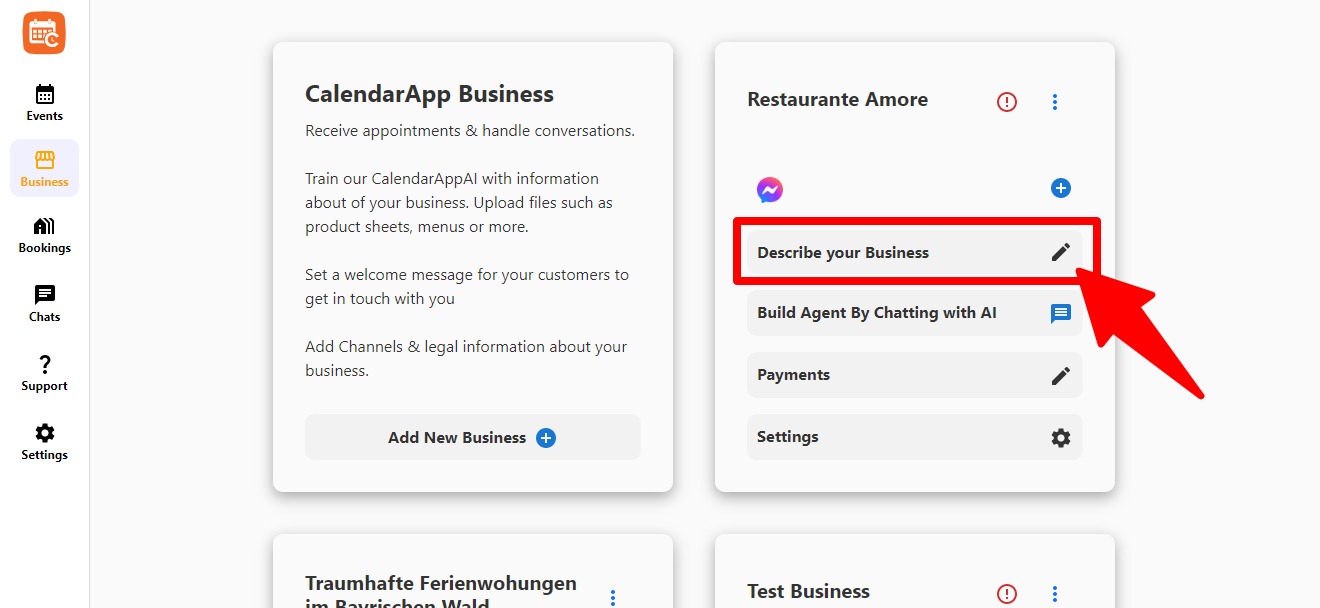
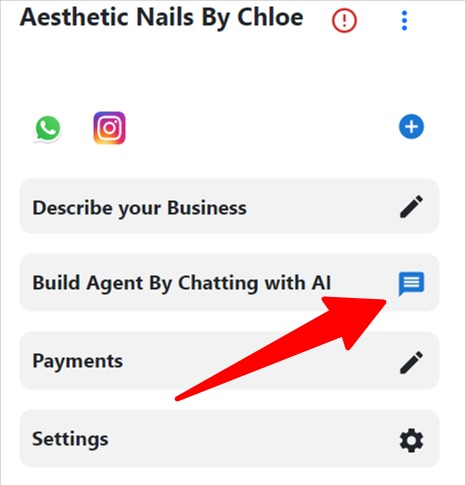
- Click on Build AI Agent By Chatting With AI
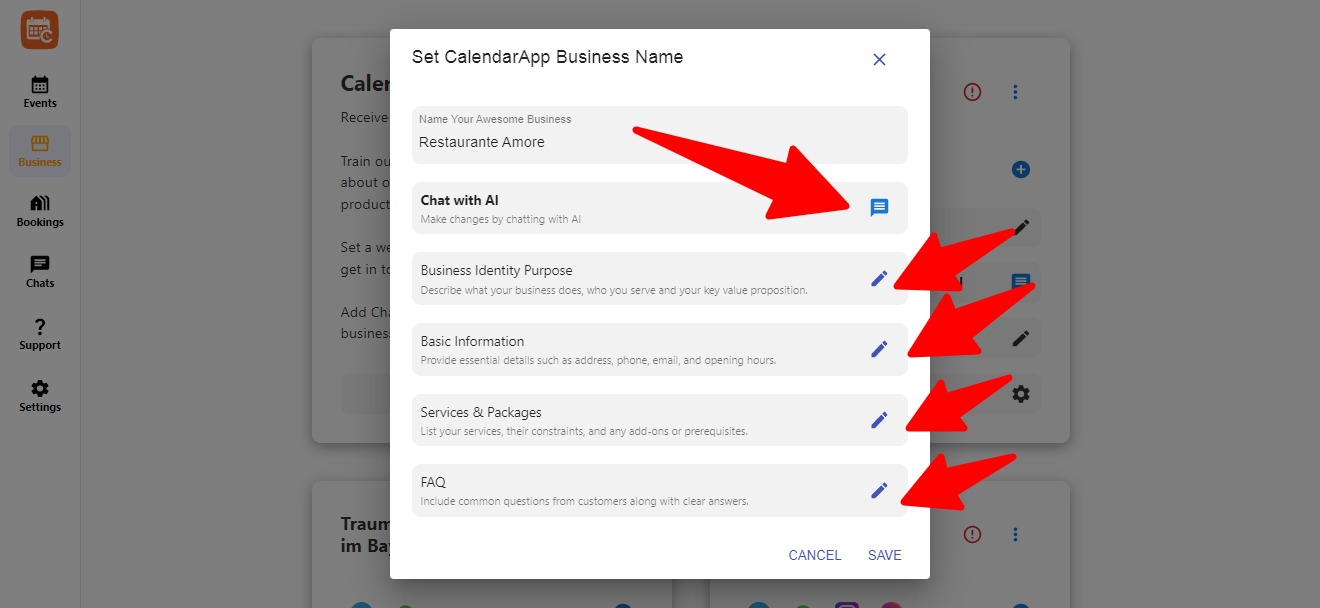
- Click on Describe Your Business of your CalendarApp Business. You pick the specific part you want to adjust and click the pencil icon
![]()
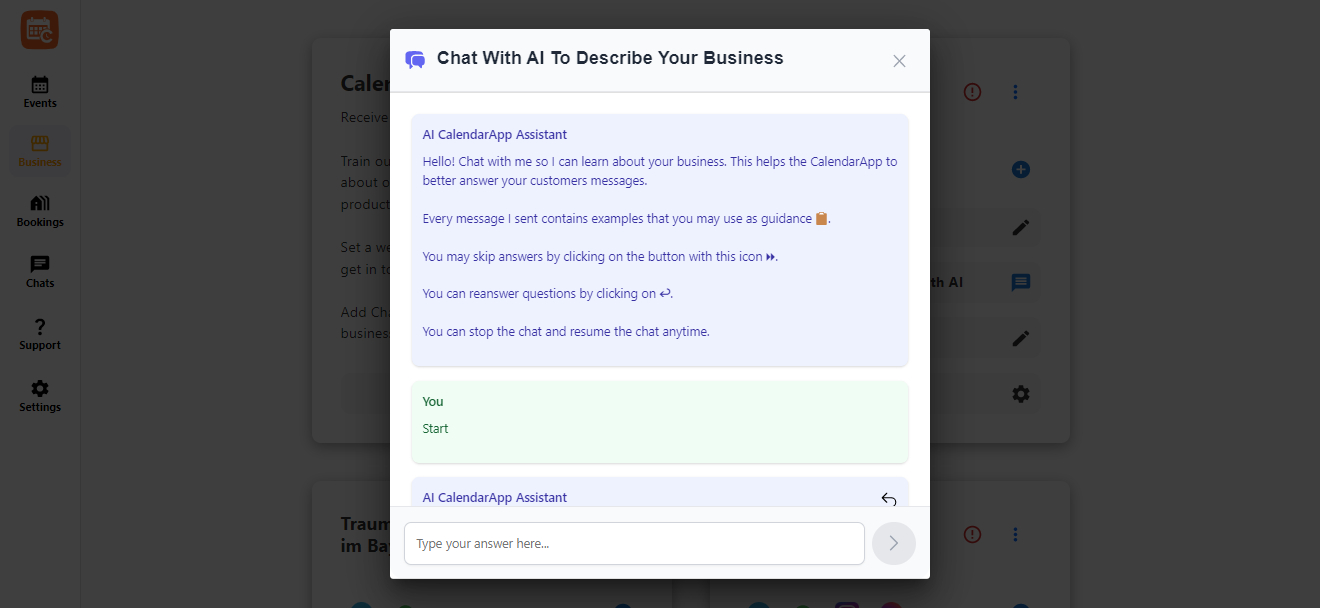
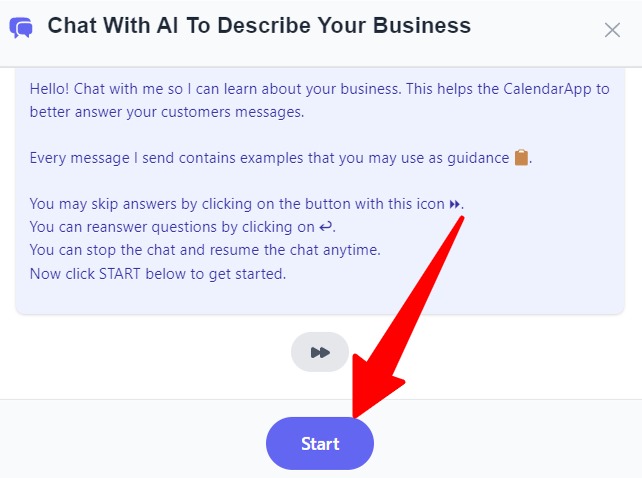
If you start the chat you will be prompted with guidlines.

- Click Start to start training the AI Agent
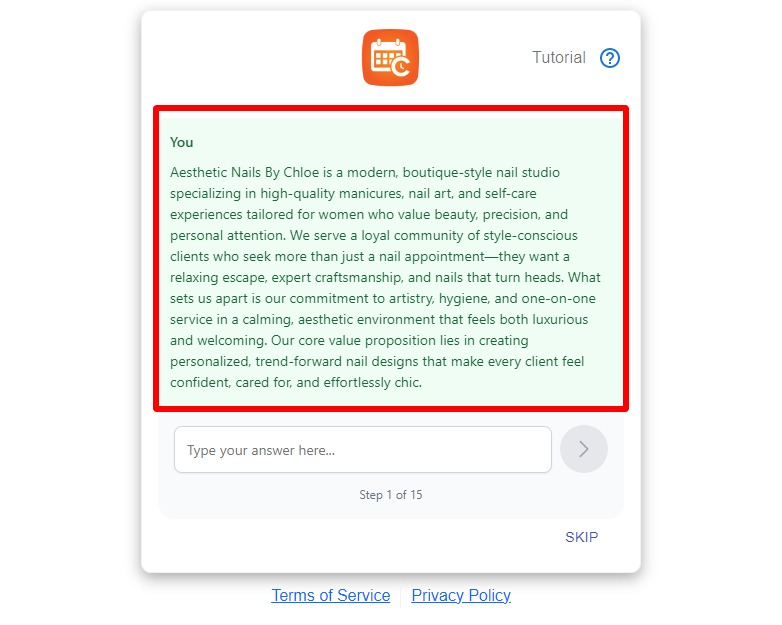
- The 1. question is about your business identity:
Describe what your business. Include what it does, who you serve, your key differentiators, your core value proposition,..
You answer something like this:
Aesthetic Nails By Chloe is a boutique nail studio offering high-quality manicures, nail art, and personalized self-care experiences for style-conscious women. It stands out through expert craftsmanship, strict hygiene, and one-on-one service in a luxurious yet welcoming environment. The core value proposition is delivering trend-forward, custom nail designs that make clients feel confident and cared for.
- Click on the arrow icon to send the message
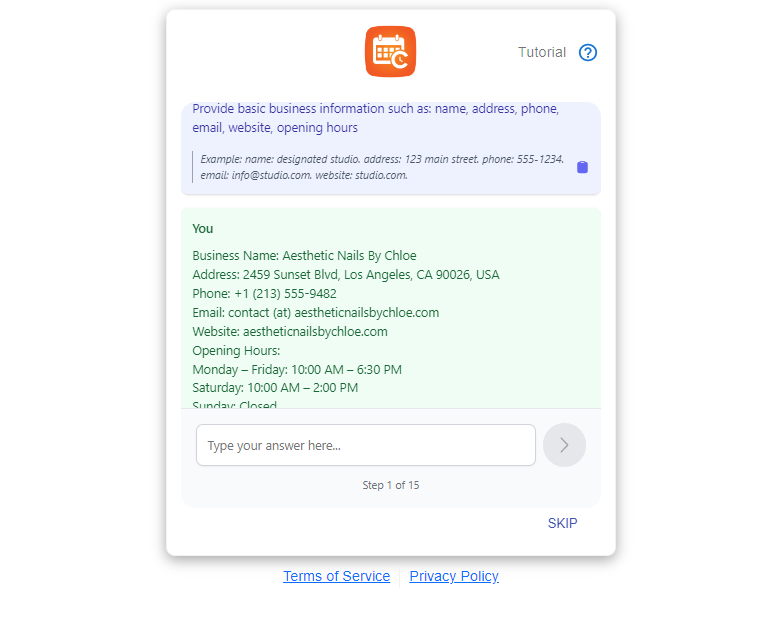
- The 2. question is about your contact details:
Provide essential details such as address, phone, email, and opening hours.
You may answer like this:
Name: Designated Studio
Address: 123 Main Street
Phone: 555-1234
Email: info@studio.com
Website: studio.com
Opening Hours: Monday–Saturday 10:00 AM – 7:00 PM, Sunday closed
- Some questions I skipped and filled out later.
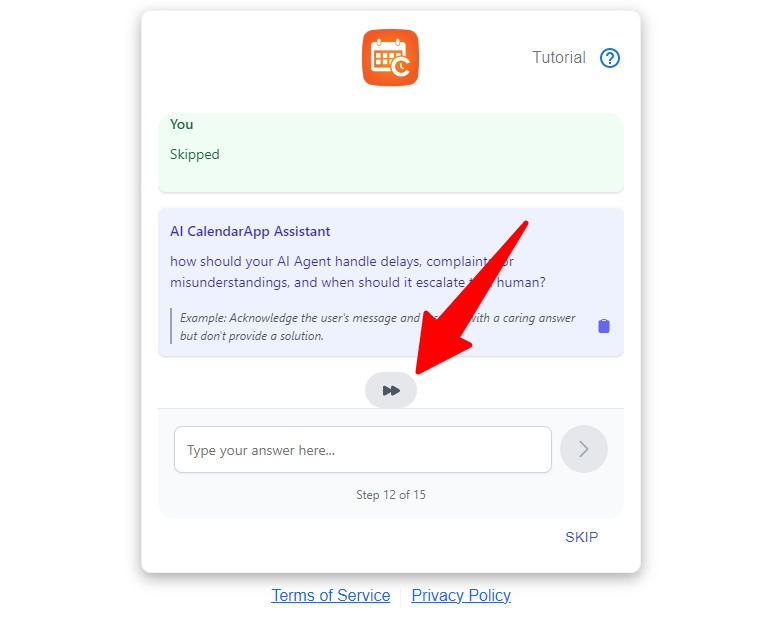
- Click on this icon to answer the question again
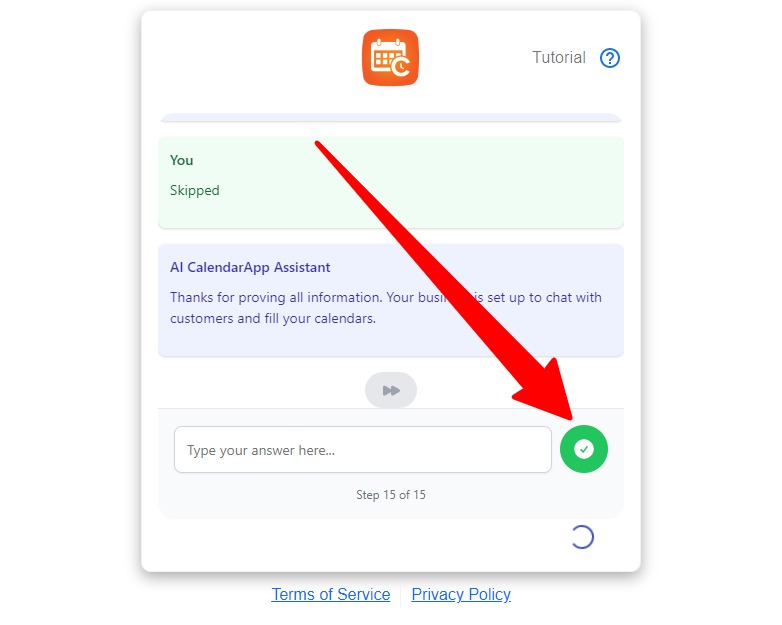
When training was done, I clicked finish and the AI was ready to use.
Step 6: Adjusting My First Event – Pedicure
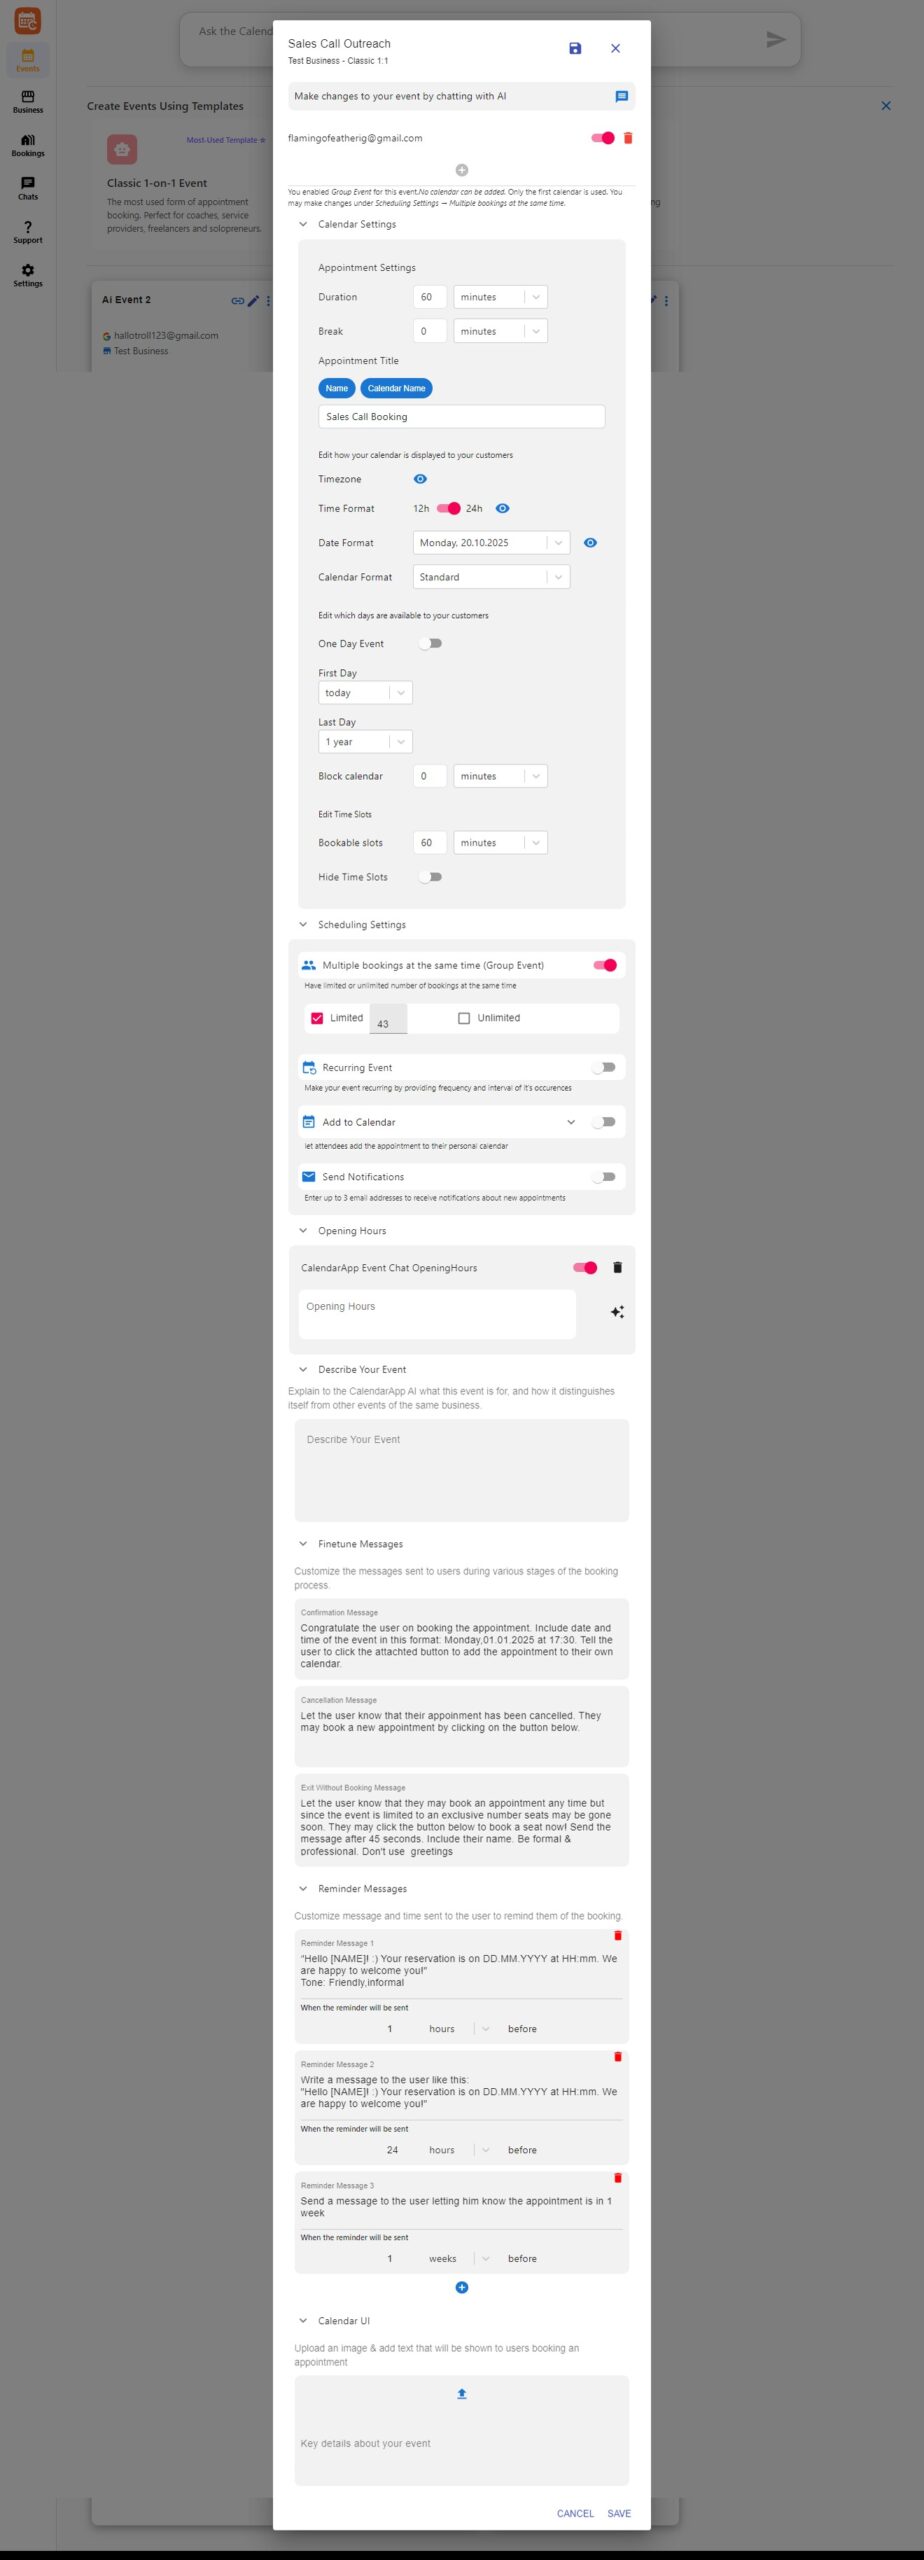
The Pedicure event was already created, but I wanted to make sure it reflected my setup. I opened the event and made some changes.

I renamed it to Deluxe Pedicure and updated these fields:
- Duration: 60 minutes
- Booking Window: show available slots every 30 minutes
- Add to Calendar button: enabled
Next, I added the description so that clients understand what they’re booking.
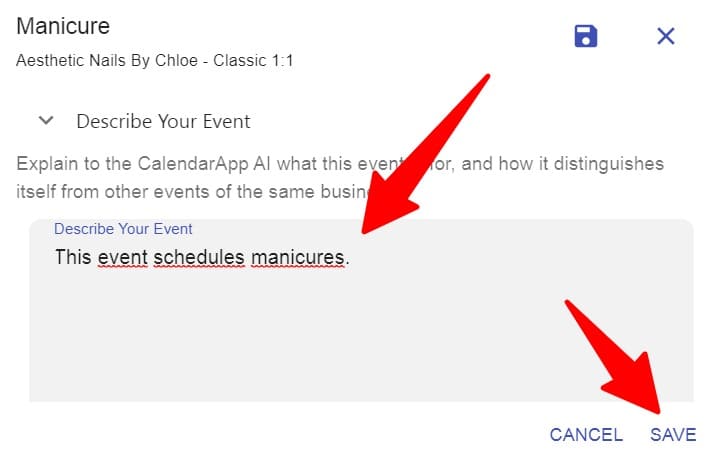

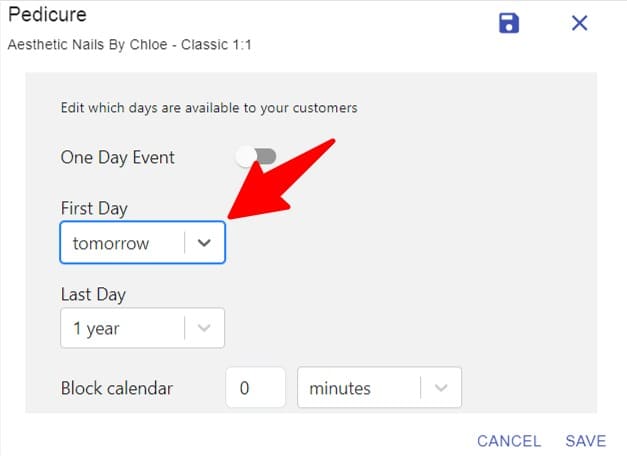
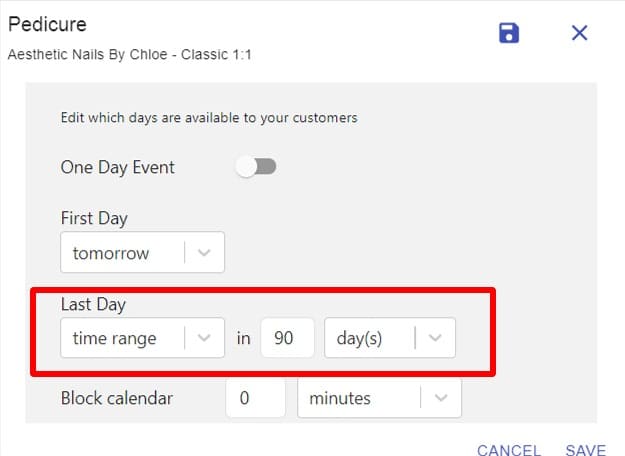
Then I adjusted the first and last possible booking day so clients couldn’t book too far out.
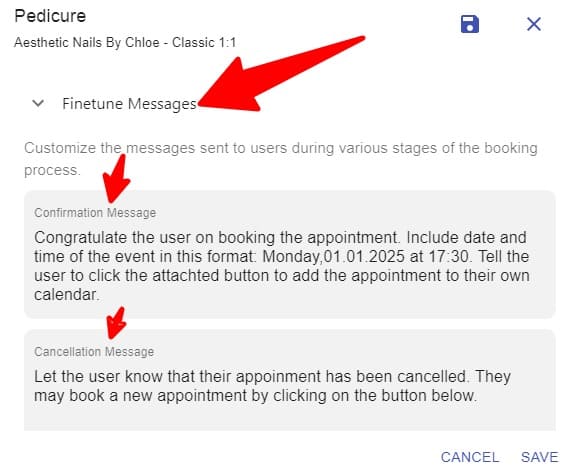
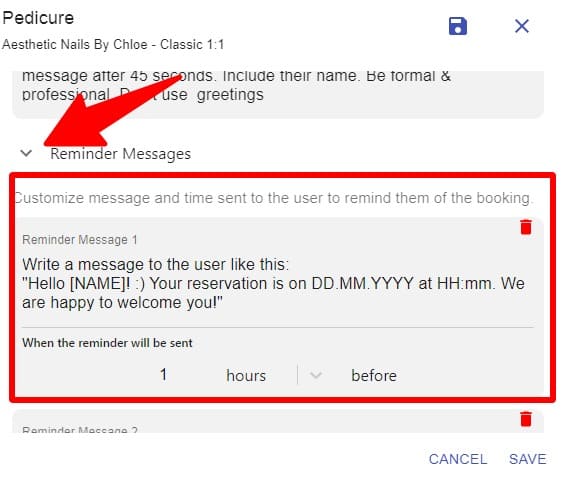
I also fine-tuned the confirmation and reminder messages to sound personal.
Finally, I saved all the changes.
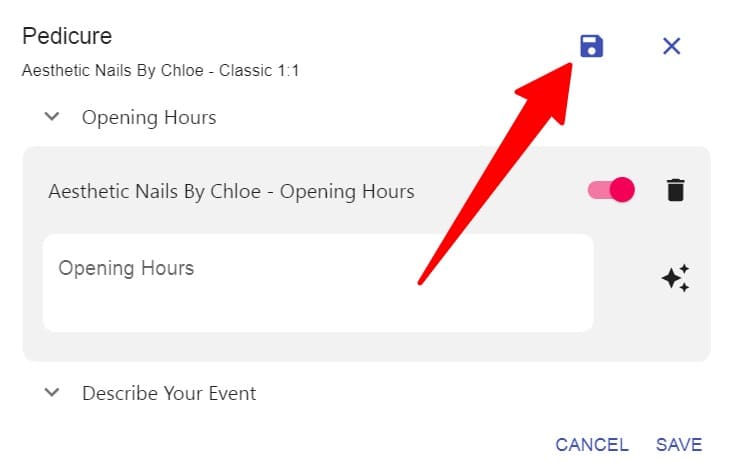
Step 7: Creating Opening Hours
To control when people can book, I created a calendar specifically for my opening hours.
I clicked into the opening hours section:

I then wrote my hours (for example: Monday to Friday, 10:00 to 18:00) and applied them.
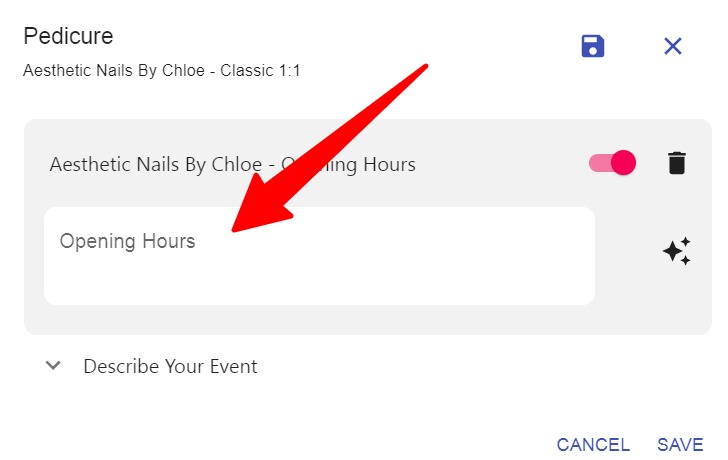
Once saved, the CalendarApp automatically applies these rules to every appointment.
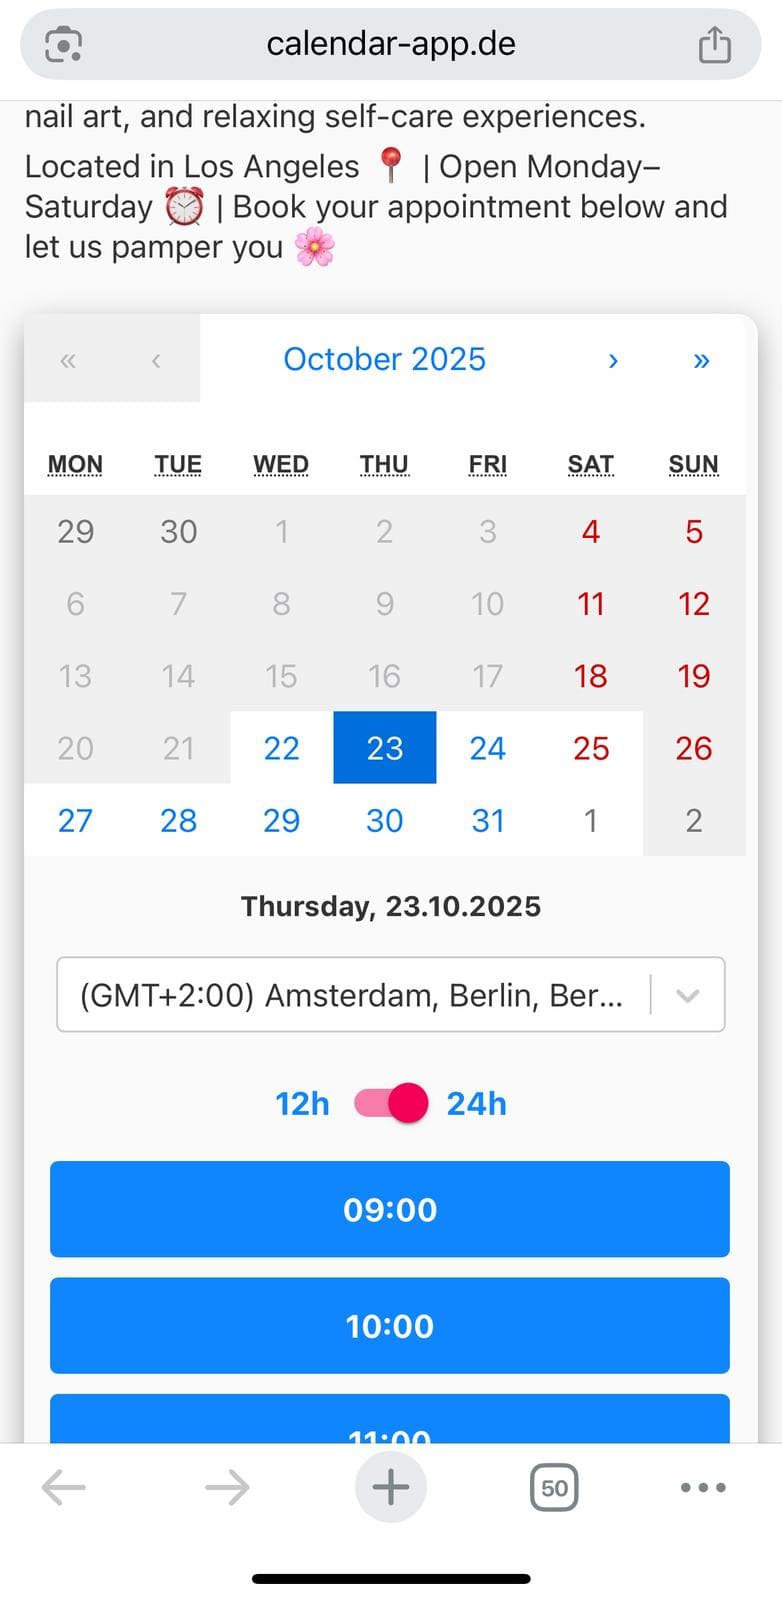
Step 8: Booking Flow on WhatsApp
Now that everything was set up, I tested the WhatsApp flow.
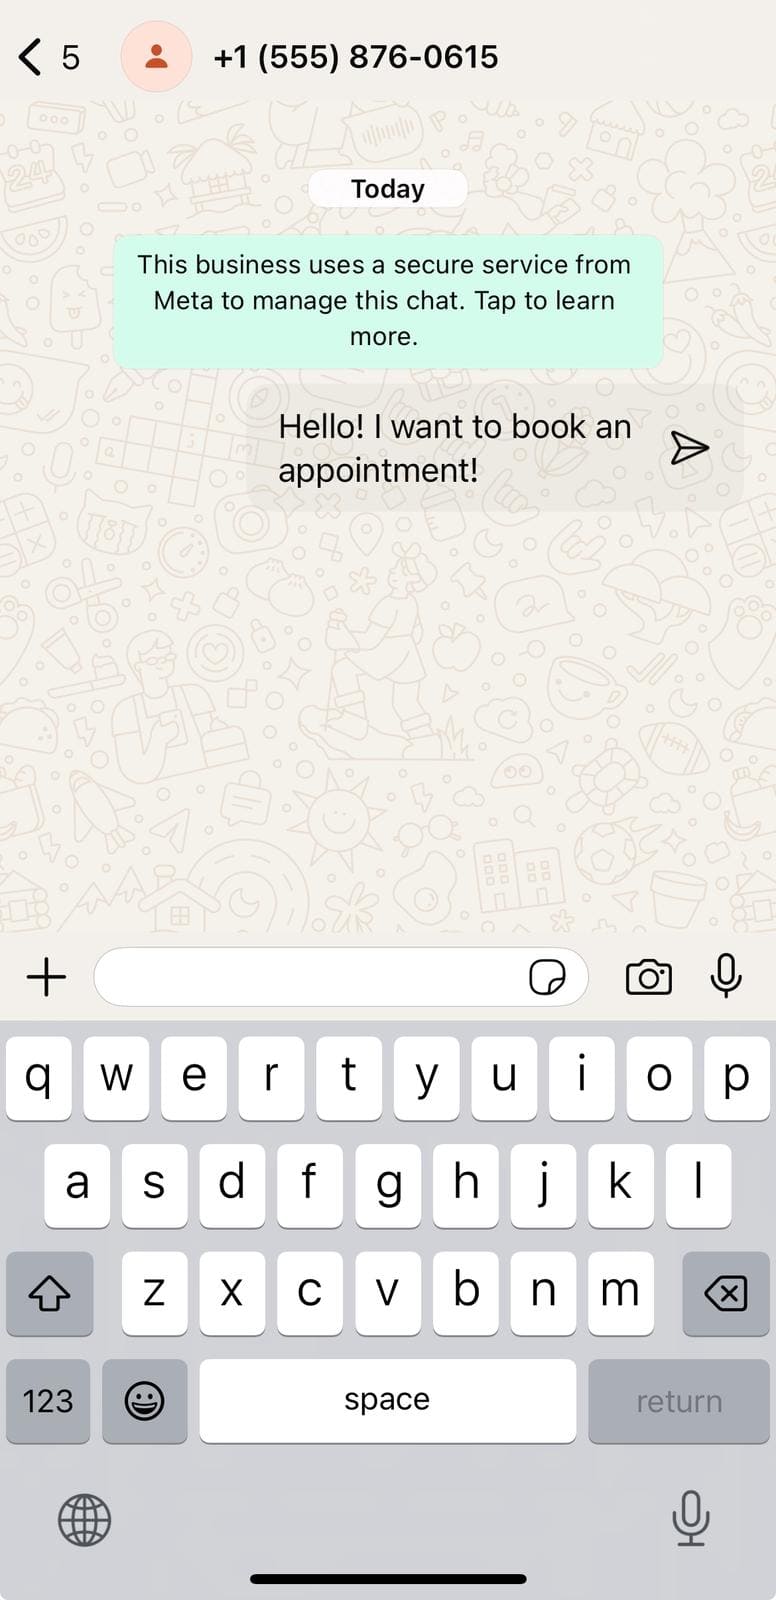
- A client sends a message on WhatsApp.
- The system replies with a welcome message.
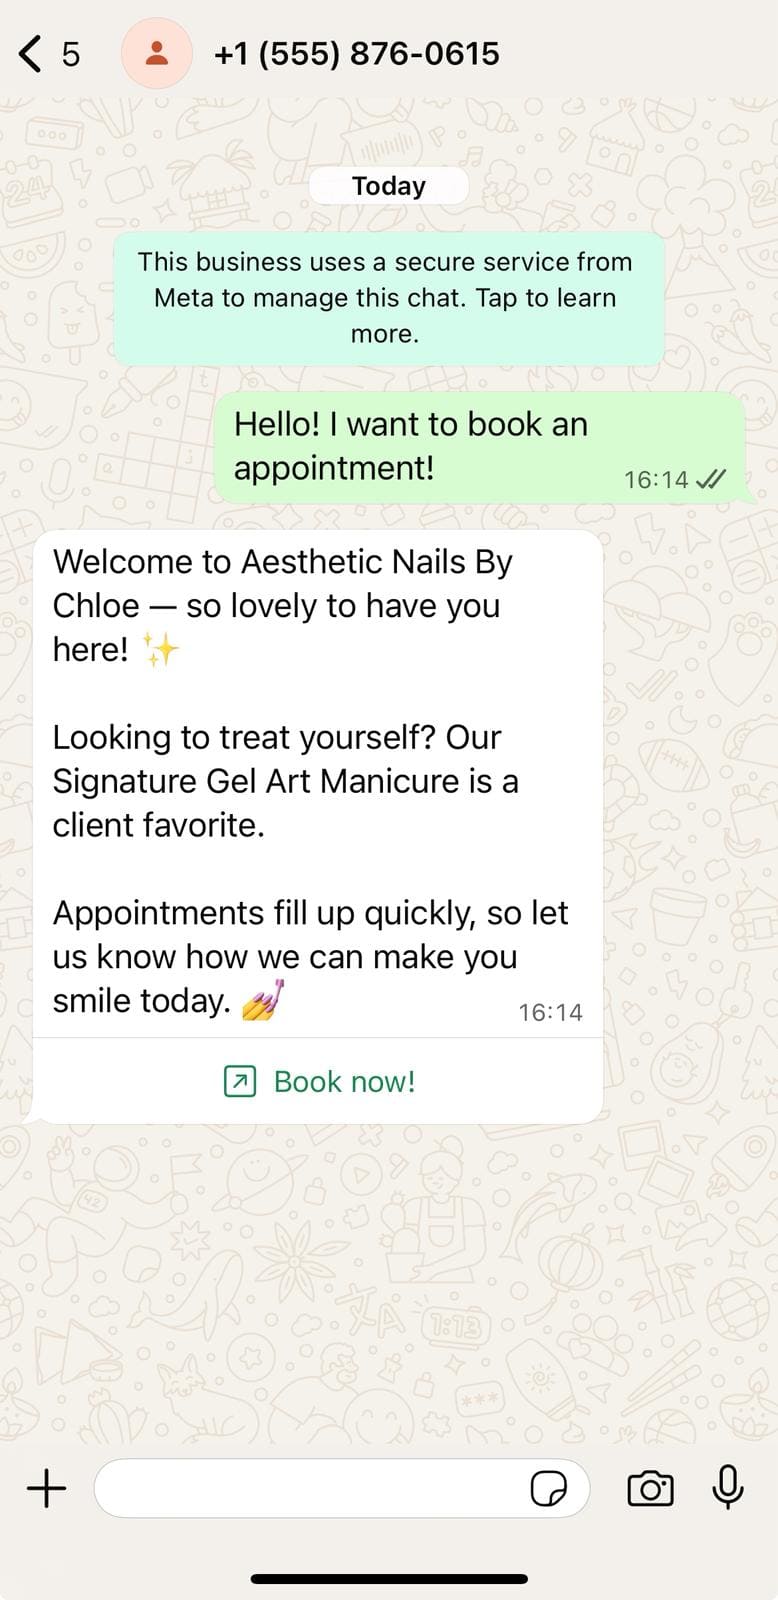
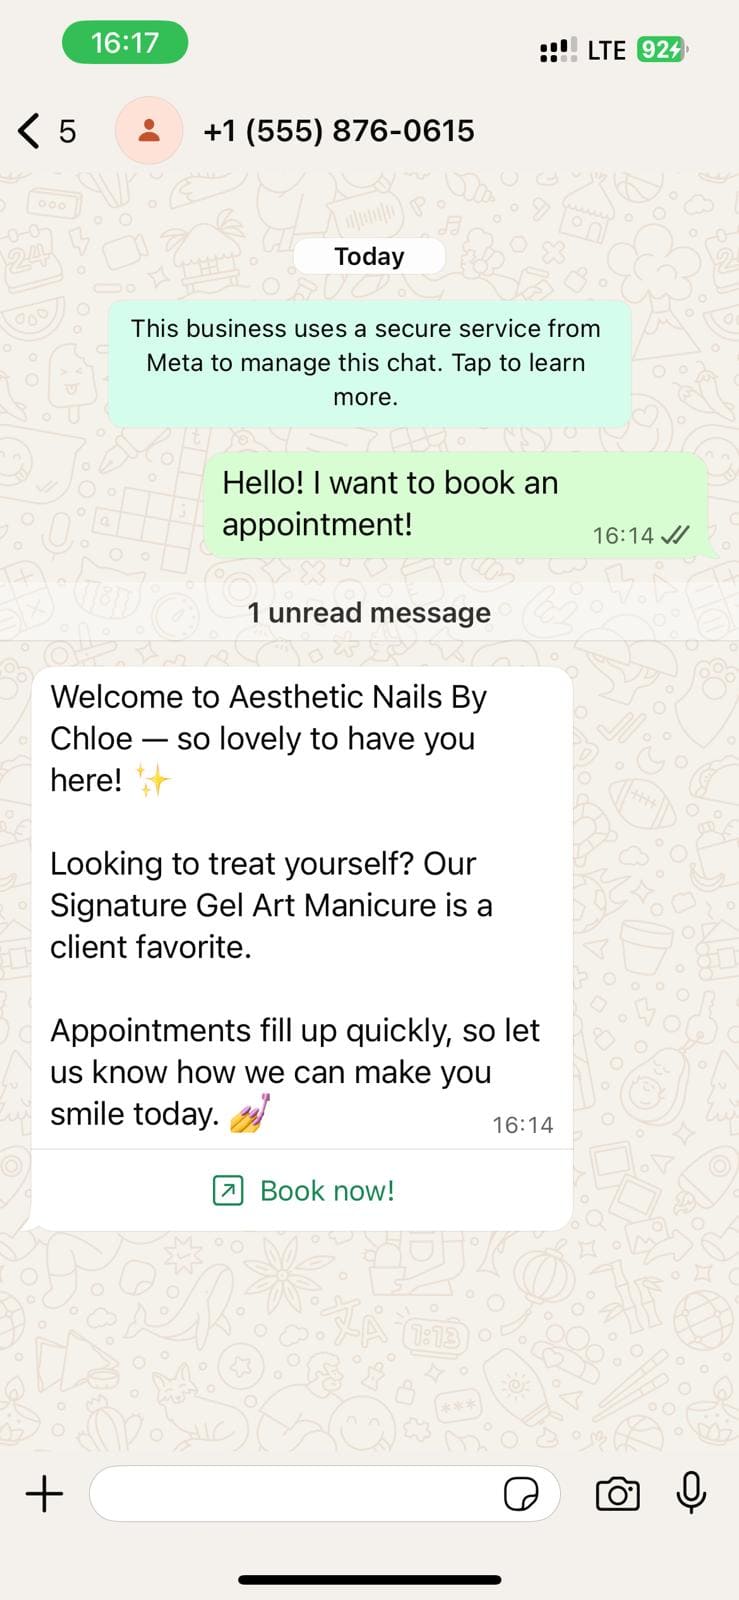
- A booking button appears which opens up a calendar with real-time availability.
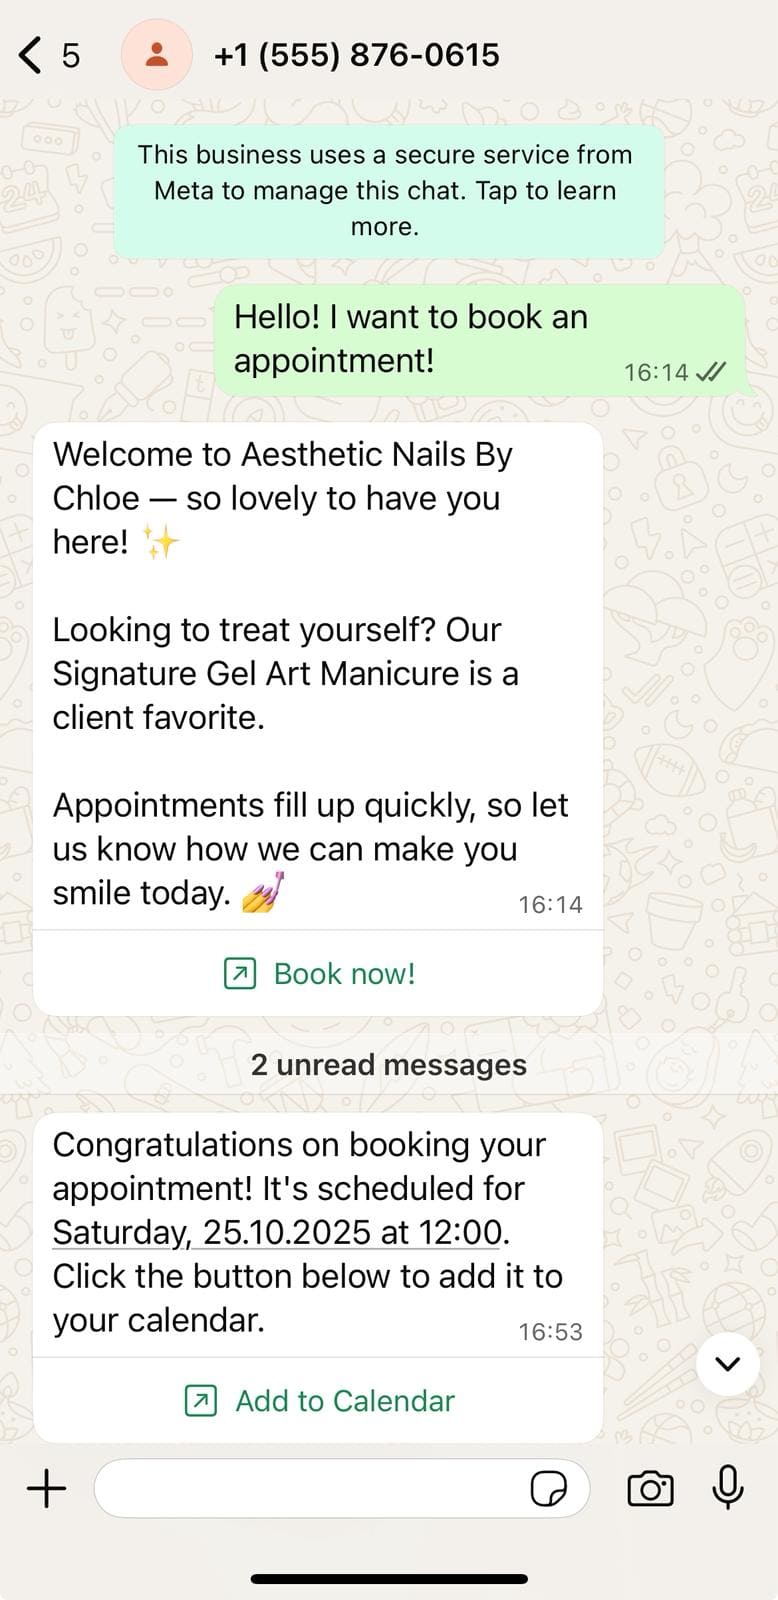
- The client selects their preferred time slot and confirms
Step 9: Rescheduling an Appointment
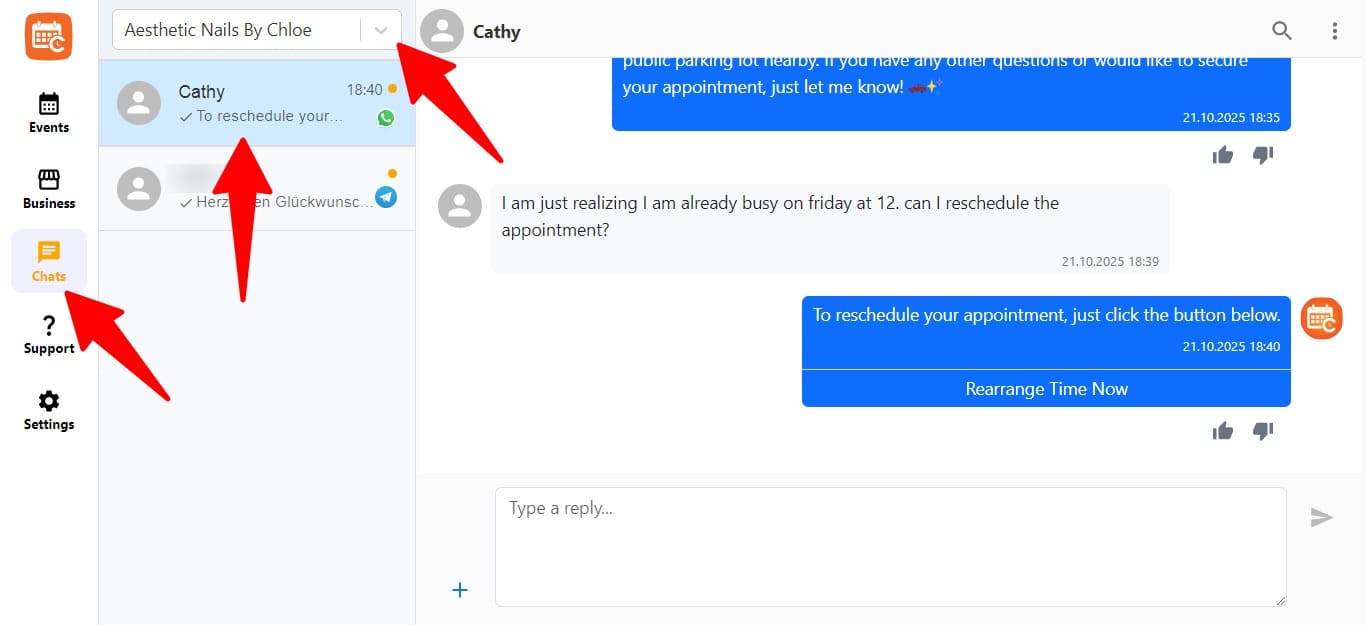
One client wanted to change their appointment. Instead of me having to jump in, here’s what happened:
They clicked on the reschedule button in the confirmation message. The system then showed the client a calendar with the available slots. They picked a new time, and everything was updated.
No messages were required. No back-and-forth. It just worked.
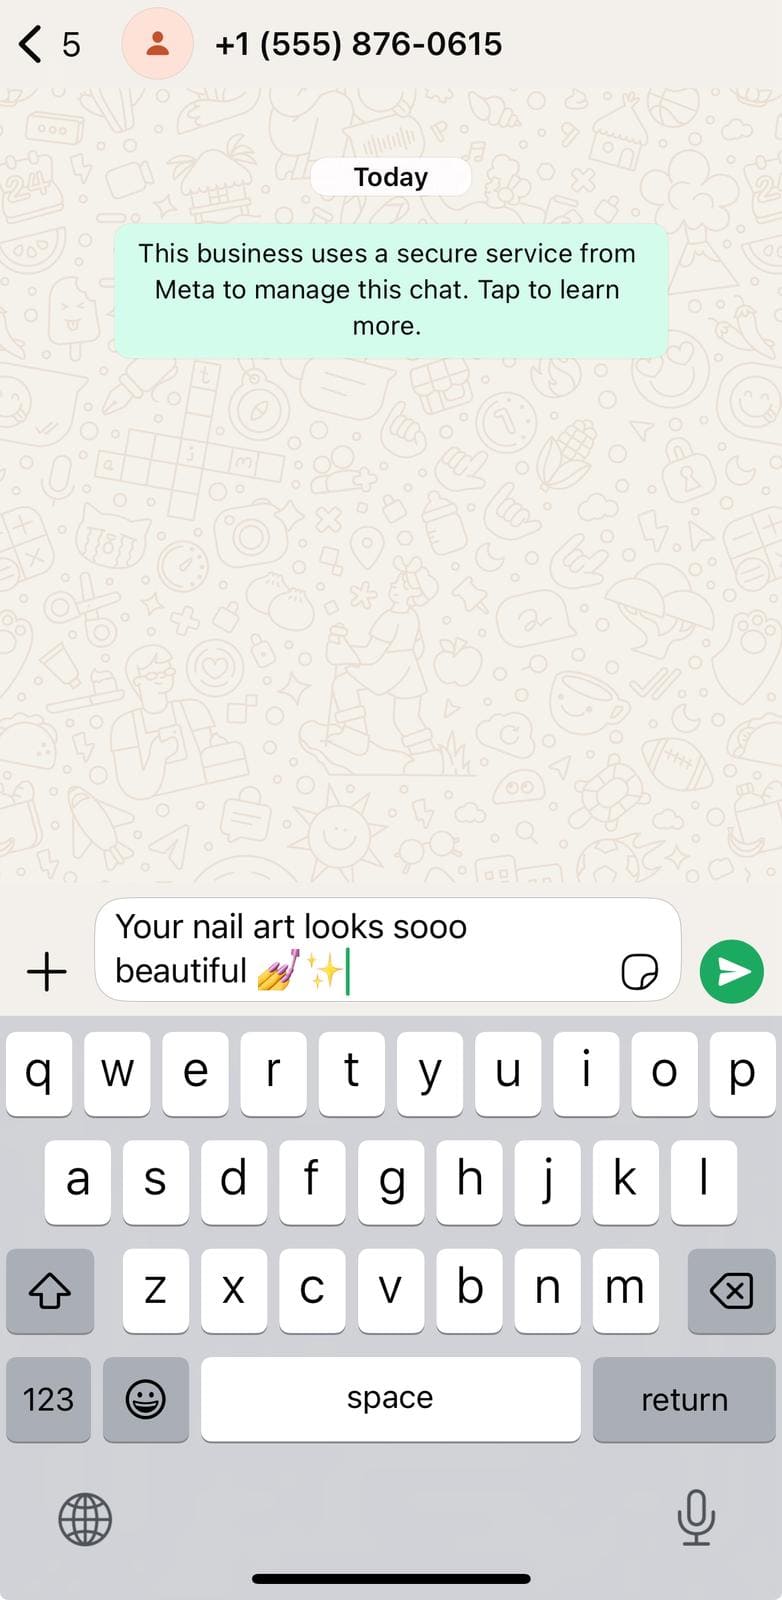
Step 10: How the Chat Looks From My Side
When I log into CalendarApp, I can go to the chat section and select a customer. Inside that view, I can:
- See the full conversation
- View customer contact details
- Know which business profile the chat belongs to
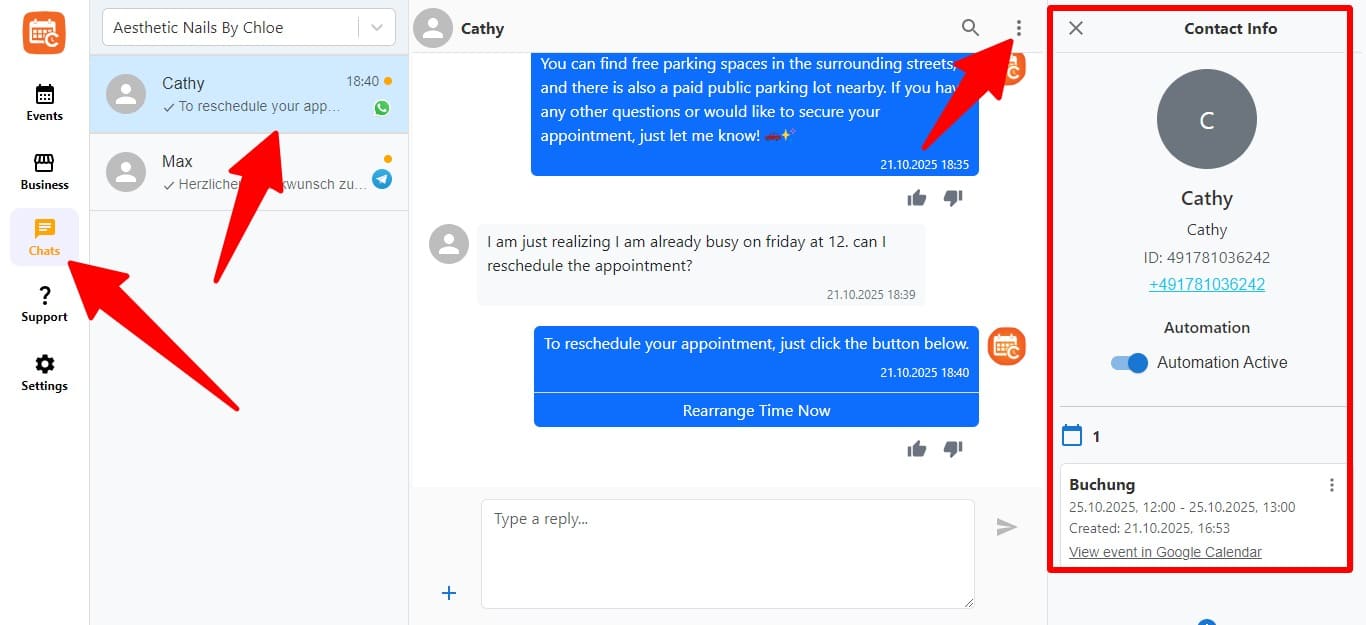
This helps me stay in control and take over manually if needed.
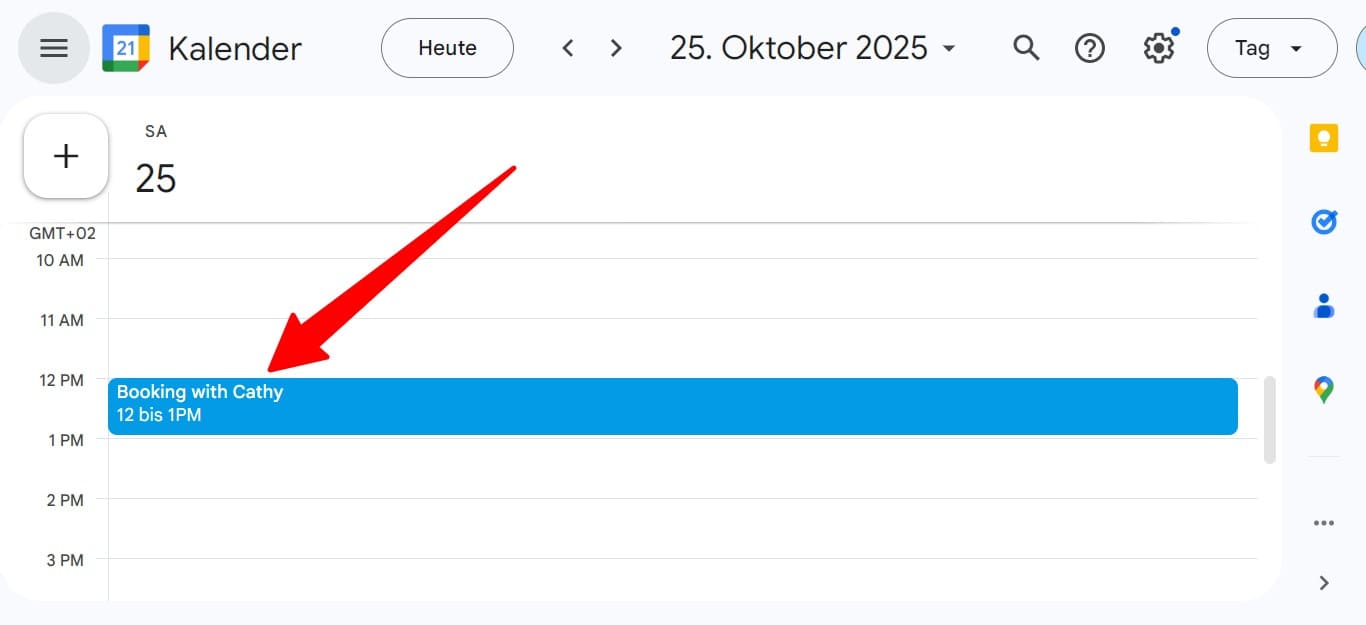
Step 11: What Shows Up in My Google Calendar
Once a booking is made, it appears in my connected Google Calendar.
There are two calendars:
- One for appointments
- One for opening hours
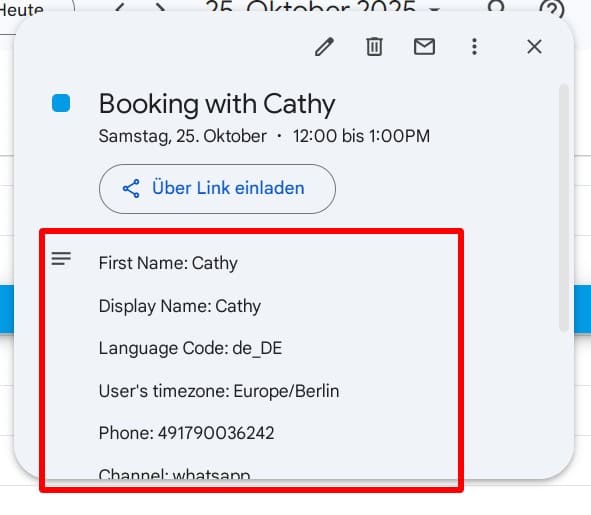
The appointment calendar shows:
- Client name
- Time and service
- Notes and details
The opening hours calendar visually blocks off when I’m available. Together, this setup ensures no double bookings, no scheduling conflicts, and full control.
My Real Results
After using CalendarApp, here’s what I saw:
- 3X more bookings
- 95 percent of messages handled automatically
- Over 40 hours saved per month
- 20 percent more rebookings
Clients loved the speed and I had peace of mind.
What You Can Learn From This
If you run a nail studio or any appointment-based business, this setup is a game changer.
- You’ll stop losing bookings to slow replies
- You won’t be tied to your phone all day
- You’ll still sound like you—because your AI speaks in your tone
- Your calendar stays updated without any extra work
Final Thoughts
I hope this detailed step-by-step guide helps you feel confident to set this up yourself. Every part of this system is made to support people like us—busy, creative professionals who want to grow without burning out.
You’ve seen how it works. You’ve seen the screenshots. Now go try it.
— Chloe