With the Calendar App you can adjust your calendar settings in a way that it suits your event the best. Those calendar settings range from setting the duration to the event all the way to timezone settings and a limit until appointments can be booked. Your calendar settings will be applied immediately and can be edited anytime.
If you don’t have a CalendarApp account yet sign up for free!
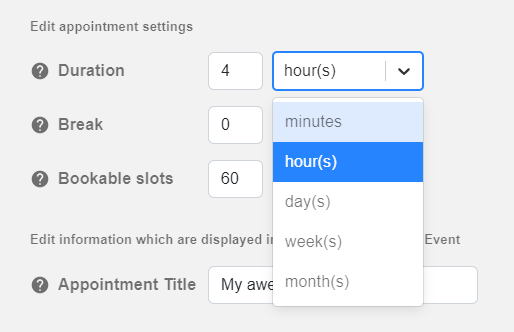
Setting an appointment duration is the most basic and fundamental appointment setting. You can decide how long an appointment with your customer will last. By default 60 minutes are selected. In order to change the duration of your appointment:
(1) Input a number
(2) Decide which time frame the appointment should have. From the dropdown you can decide between:
minutes
hours
weeks
months
(3) Save your changes & Save your event
Now, once a customer selects date and time on your CalendarApp calendar your selected duration will determine the end time of the appointment.
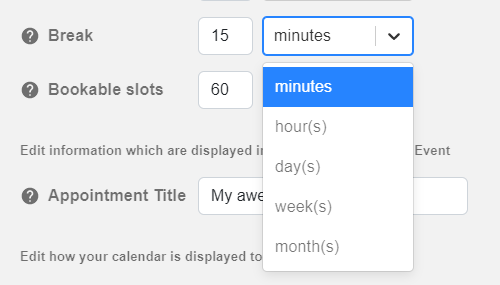
b) Break
In order to have time between two appointments you can set breaks. So, instead of having a meeting that starts at a time when your previous meeting finishes you can block this time in your calendar. Take your time, have a coffee and get prepared for your next appointment. To set a break for your appointment:
(1) Input a number
(2) Decide which time frame the appointment should have. From the dropdown you can decide between:
(3) Save your changes & Save your event
The break will be added to the end time of your appointment. For example, your have an appointment for an hour at 12pm and selected a 15 minute break. That means the next appointment can be booked at 1:15pm (13:15).
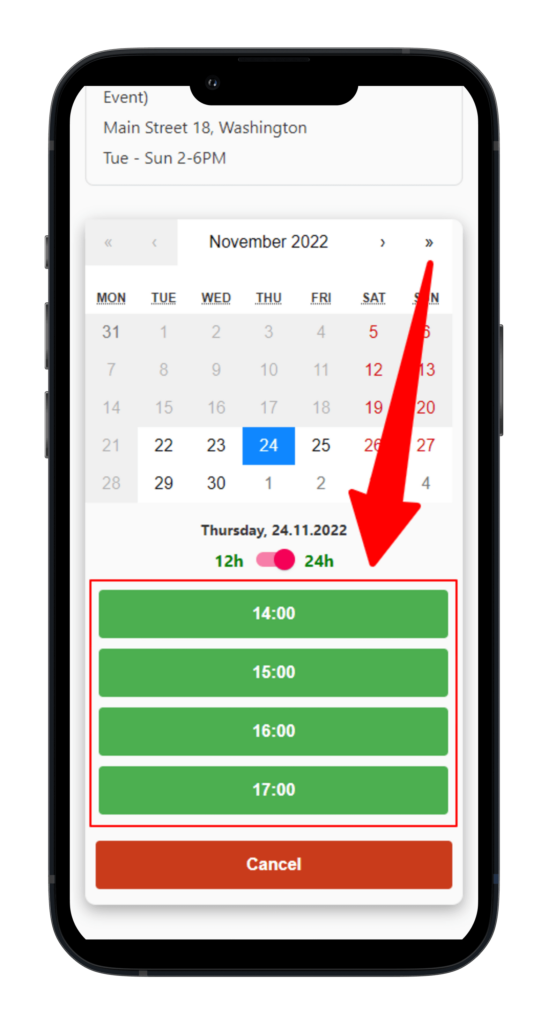
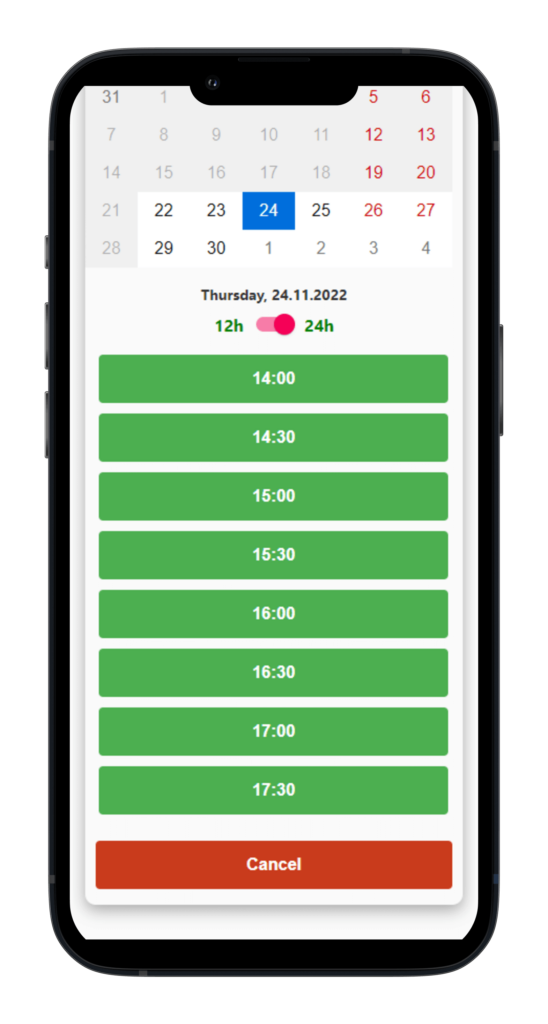
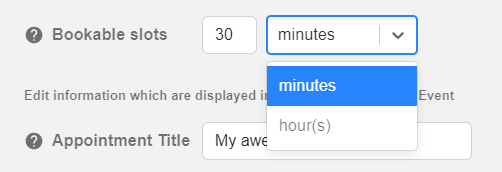
b) Bookable Slots
Bookable time slots are the buttons that are displayed to your customers. They can be clicked in order to schedule an appointment with you.
You can decide when an appointment can be booked and how many appointments you want to offer per day by adjusting the bookable time slots.
Basic example: your appointment takes 1 hour. You set your bookable slots to 1 hour.
Your customers can book an appointment at every full hour of the day which takes 1 hour. Second example: You want to offer your customer the chance to book an appointment at the half hour, too. Now, you set your bookable slots to 30 minutes.
Now, your customers can also book an appointment with you every 30 minutes which takes an hour.
Your availability remains untouched: So,if a customer schedules an appointment at 4:30pm (16:30) 5pm (17:00) will no longer be available.
Bookable slots give you a more flexible option to have your meetings scheduled.
To set your bookable slots:
(1) Input a number
(2) Decide which time frame the appointment should have.
From the dropdown you can decide between:
minutes
hours
(3) Save your changes & Save your event
2. Google Calendar Appointment
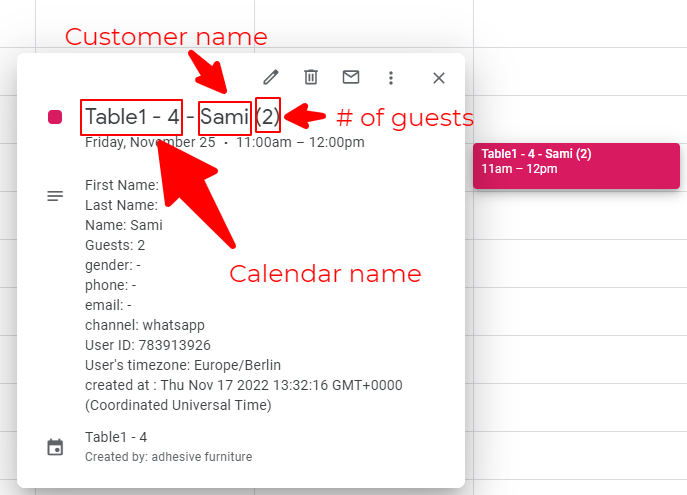
When a customer books an appointment with you an entry is made to your Google Calendar. This entry will contain information such as the title of the appointment, obviously its start and end time and additional information about the subscriber.
In total this information is visible to you:
Appointment title
Calendar name
Customer name
Start and end time of the appointment
The number of guests (if applicable)
Check in and check out date (if applicable)
Additionally in the body of the entry the following information is provided to you:
First Name
Last Name
Name
Guests (if applicable)
Check in and check out date (if applicable)
Gender (if provided)
phone (if provided)
email (if provided)
channel the user created the appointment in
Manychat’s User ID
User’s timezone
The exact time the appointment was created at
You can edit the title of the Google Calendar entry. To edit the appointment title:
(1) Input your appointment title
(2) Save your changes & Save your event
3. Calendar Display Settings
Since time zones and date formats differ internationally you need to adjust those settings according to your custom audience. The CalendarApp offers you a various number of calendar display settings that you can easily set and change according to your CalendarApp event.
a) Timezone
When a customer opens your CalendarApp calendar the time zone your user is in is automatically detected. And, if the time zone differs from yours available time slots are automatically adjusted to your customer’s time zone. So, nobody will ever have a time zone confusion.
However, you can decide whether the user can adjust the displayed timezone.
In order to show the time zone dropdown:
Set it to
The time zone can be changed by selecting the time zone from the dropdown. Bookable slots will then be recalculated accordingly
In order to hide the time zone dropdown:
Set it to
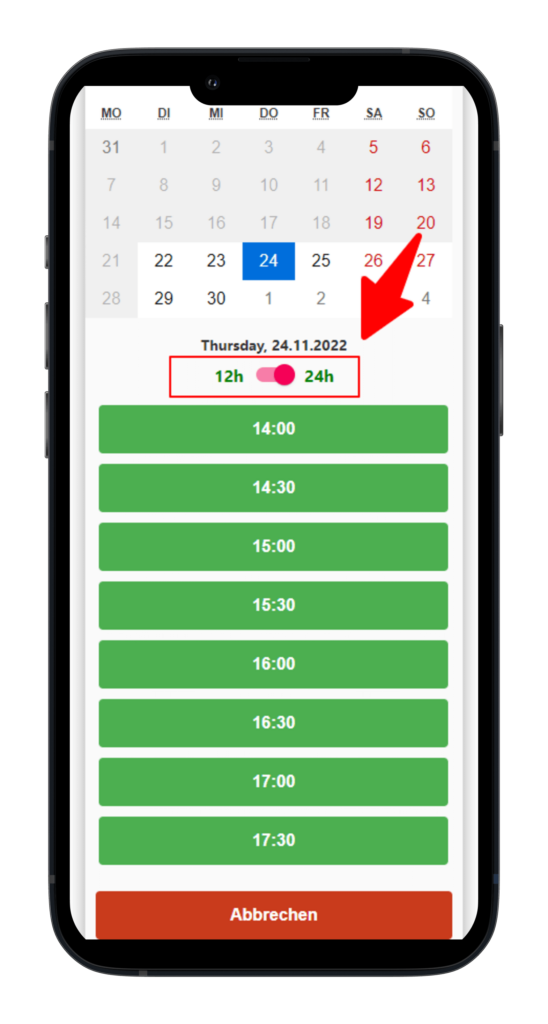
b) Time Format
Time can be presented in two different formats: either 12h or 24h resulting in either 1PM or 13:00. The CalendarApp lets you decide which format is the default one and whether your customers can switch to the other format.
By default the format is set to 24h with and option for your customer to switch.
To set the opposite format as default:
Adjust accordingly
To make sure the customer cannot change the format:
Set the icon to
To make sure the customer can change the format:
Set the icon to
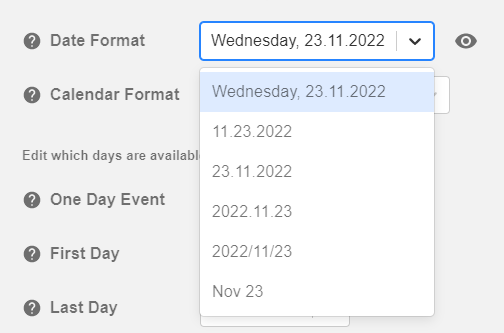
c) Date Format
Like times dates can be presented in various different formats. When a customer selects a date this date will be visually presented in text form below the calendar. You can set in which format this date is presented. By default this format is selected:
To change the date format:
Click on the dropdown menu and select your preferred date format
Are you missing a date format? Simply request it by submitting a support ticket.
In case you don’t want to show the selected date you can hide it. To show or hide the date format:
Set the icon to
Save your changes and your event
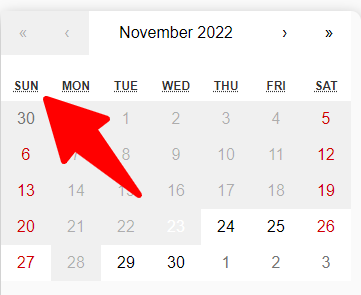
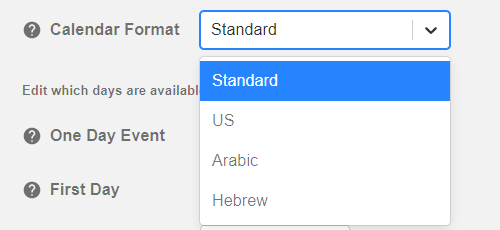
d) Calendar Format
By default the calendar view starts on Monday and ends on Sunday making Saturday and Sunday appear to be the weekend. Depending on your audience you can change this view.
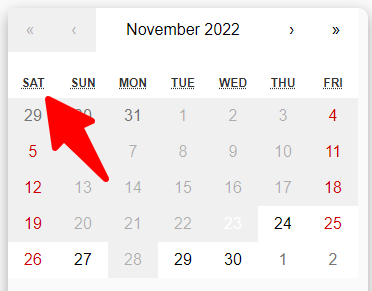
Selecting US or Hebrew will make Sunday the first day of the week.
Selecting Arabic will make Saturday the first day of the week.
To change the calendar format:
Click on the dropdown menu and select your preferred calendar format
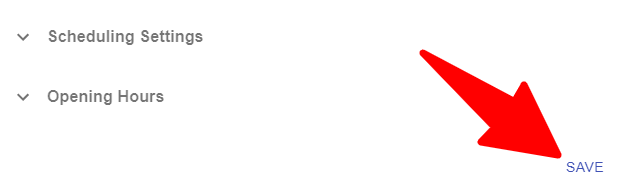
Save your changes & Save your event
4. Available Dates
With the CalendarApp you can make sure that your customers can book appointments with you only at those dates when you want them to schedule an appointment with you. For instance, you can make sure you don’t get appointments on short notice by blocking your calendar. You can also set a time period when appointments can be booked, eg. for the next 3 months.
a) One Day Event
A one day event is an event that takes place on one specific date only. For example you are an online clothing brand that opens a physical pop up shop only on one day. Hence, you want to make sure your customers can only schedule appointments on this exact day.
This date is preselected and the bookable slots are shown to your customer.
To make your event a one day event:
Set the icon to
To choose the specific date click on the calendar icon and select your date
Save your changes & Save your event
If you decide to make your event a one day event you don’t need to set opening hours.
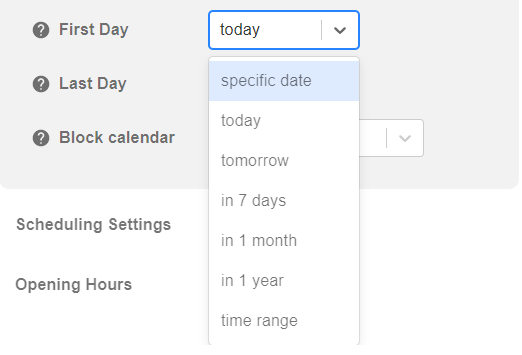
By default the first day a customer can book an appointment is today (if you are available). You can adjust this setting. For example if an appointment requires a certain time of preparation you don’t want to find a booking in your calendar that you cannot prepare for due to lack of time. Hence, you can make sure that,eg. For 3 days onwards no appointment can be scheduled.
In this example, if today is Monday, the earliest a customer can schedule an appointment with you is Thursday.
To set the first day click on the dropdown menu and select your preferred first day. You can select from:
A specific date
Today
Tomorrow
In 1 week
In 1 month
In 1 year
A time range of your choice
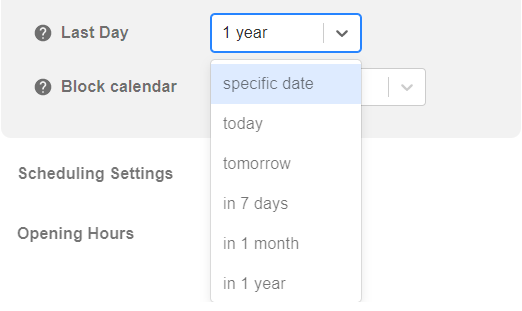
c) Last Day
To give you a better overview when appointments can be booked you can set a last day. After this day no appointments can be booked. For example, if you run an outdoor sports item rental service your season most likely ends with the summer season. This this case you can set the last day to a specific date eg. September 30.
To set the first day click on the dropdown menu and select your preferred last day. You can select from:
A specific date
Today
Tomorrow
In 1 week
In 1 month
In 1 year
A time range of your choice
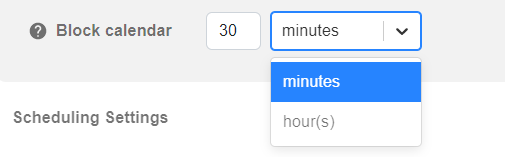
d) Block Calendar
To avoid getting appointments on short notice you can block your calendar for a dynamic specific time in the future. For example, if it’s 12:50 and your next appointment could be booked at 13:00 you can block your calendar for 2 hours so the next event can be booked at 15:00.
By default your calendar will not be blocked. To block your calendar:
Input a number
Click on the dropdown menu and select your time format. You can choose from:
minutes
hour(s)
If you have any questions watch our video tutorial or submit a support ticket.