As an agency managing your clients’ accounts is essential. Not only does it save time and is more convenient than forwarding every bit of information to your client. But in most cases you are more of an expert in handling the tool in question. That’s why in your CalendarApp Dashboard you can easily add and remove your client’s Manychat pages and Google Accounts. Giving you full control over the events created.
In this article, you will learn the 3 very simple steps to add your client’s account in order to manage events to fully automate the booking process.
If you are new to the CalendarAppor simply exploring it’s agency capabilities then sign up for a free account and start your 14 day trail.
To use the CalendarApp effectively, you need to be familiar with Google Calendar. Learn the Google Calendar Basics.
Table of Contents
1. Add Manychat Page
The first step to successfully managing your client’s accounts is adding the Manychat page. This helps you to manage your client’s Social Media Pages as well as it’s customers, data and confirmation messages.
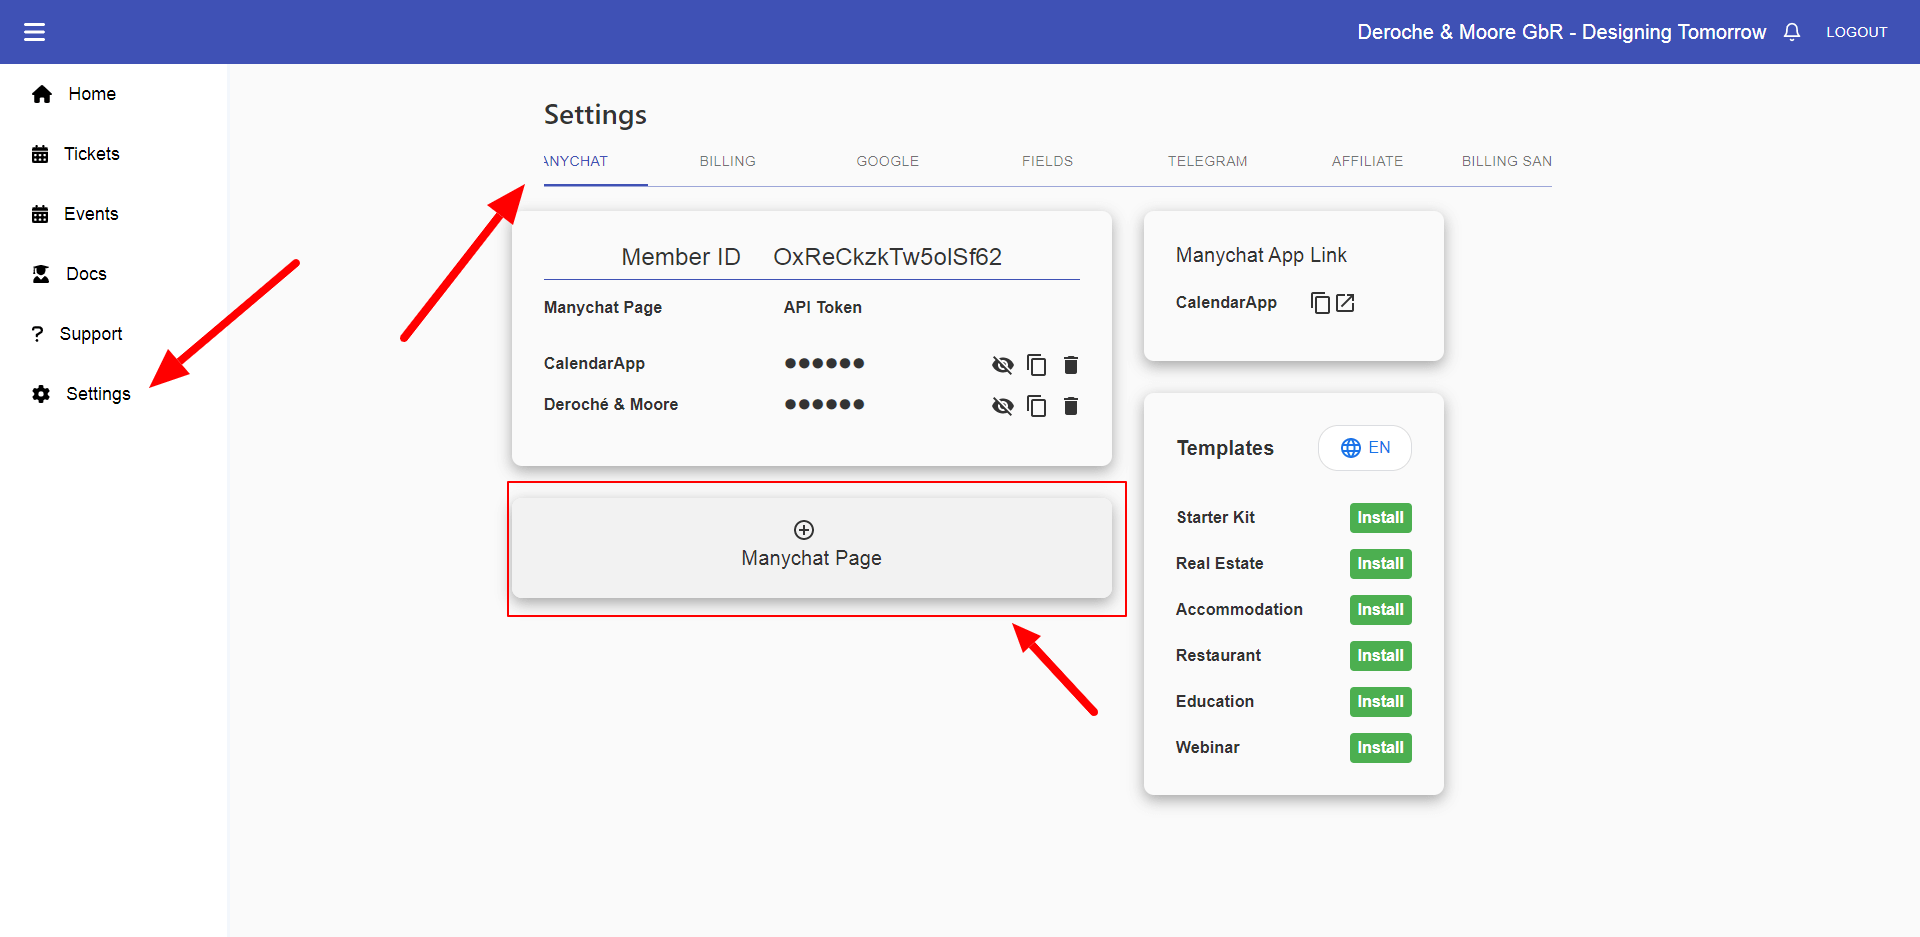
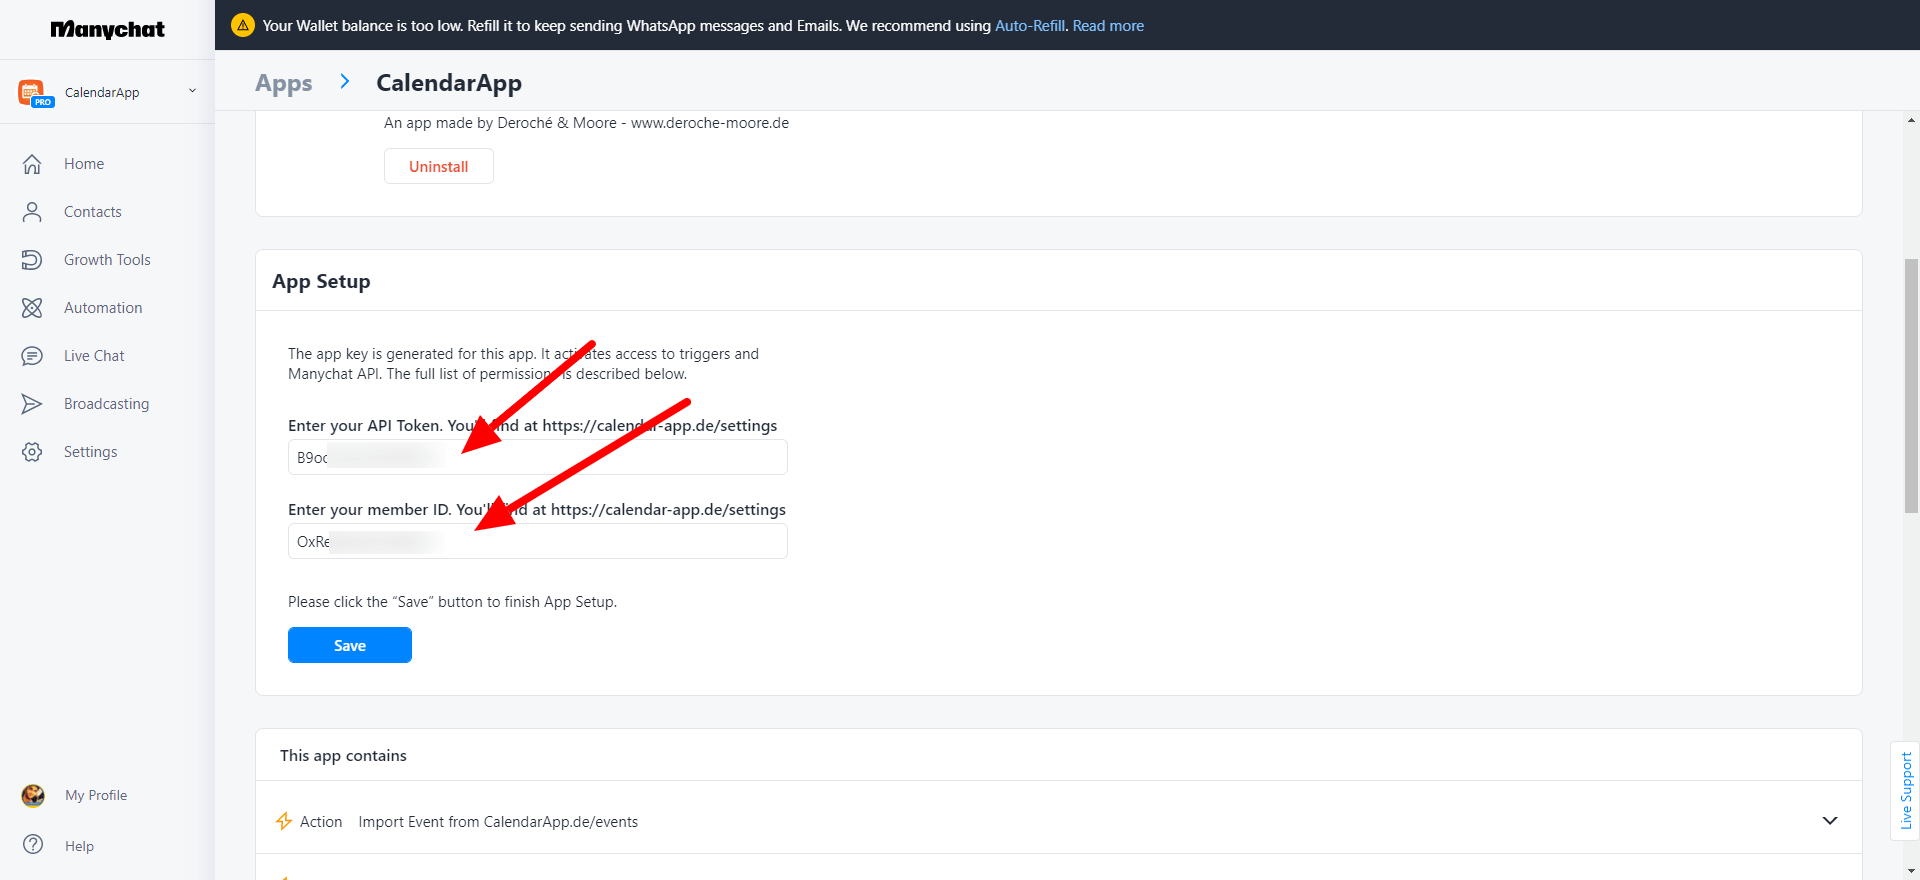
Open manychat.com sign into your account. Select your clients page and navigate to -> Settings -> Apps -> CalendarApp
Copy and paste MemberID and API Token and paste them into the according fields
Click Save
Your client’s page will show up in the list. If you don’t see it refresh your page
Congratulations! You have successfully connected your client’s Manychat page!
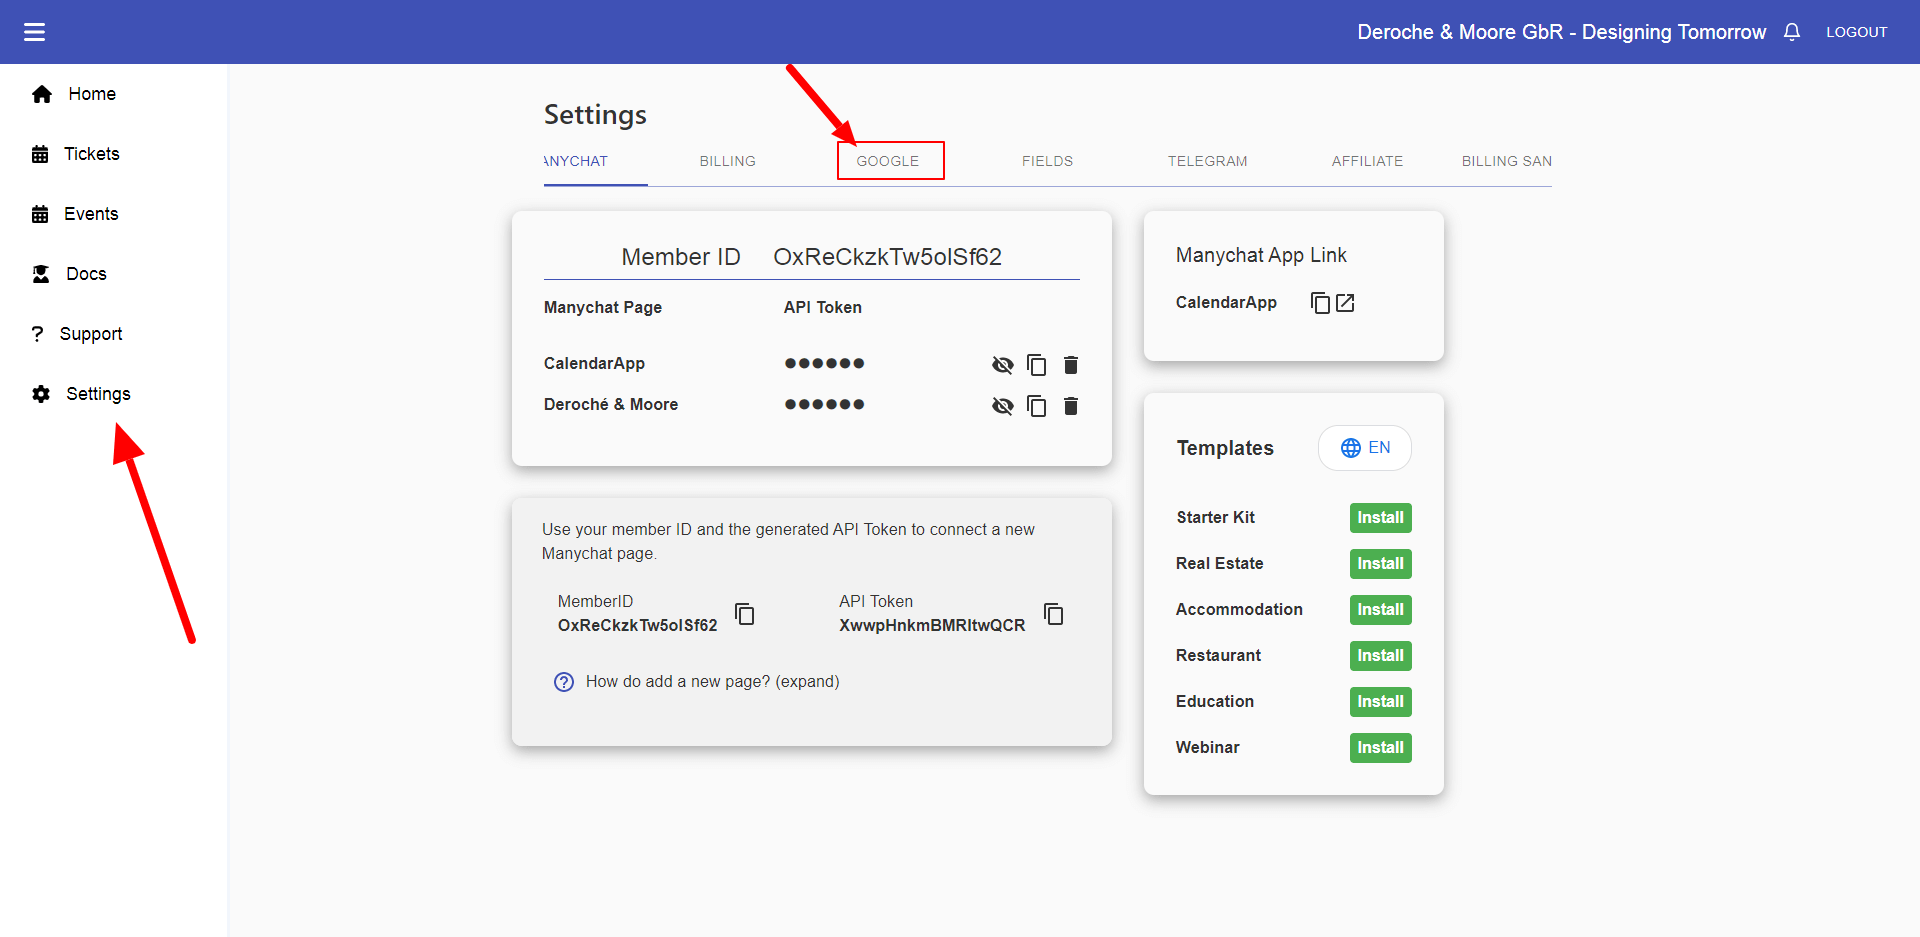
2. Add Google Account
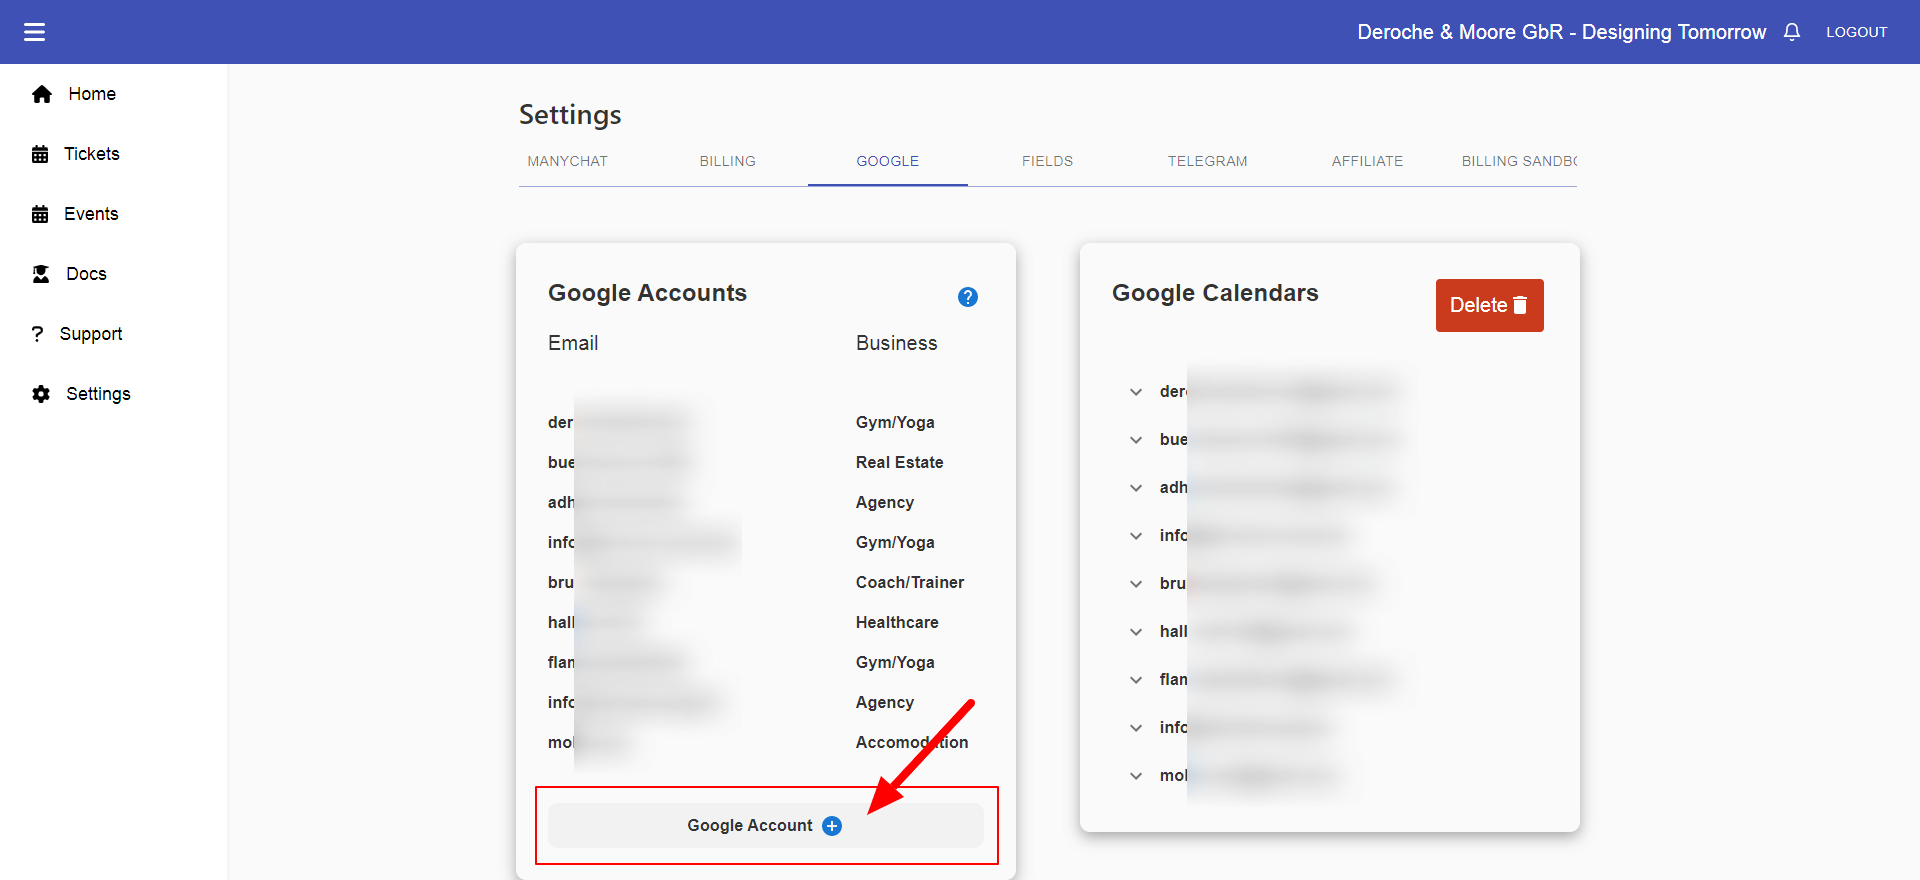
After connecting your client’s Manychat page it’s now to connect your client’s Google Account more precisely your client’s Google Calendar. Eventually, the appointments scheduled must show up in your client’s Google Calendar not yours.
Click the Copy Icon to copy the authorization URL to your clipboard
Send an Email to your client containing the URL
Once your client clicks the URL they can start the authorization flow.
When your client successfully authorized the Google Calendar you will find it in your list. Click the Edit Icon to set your client’s business niche.
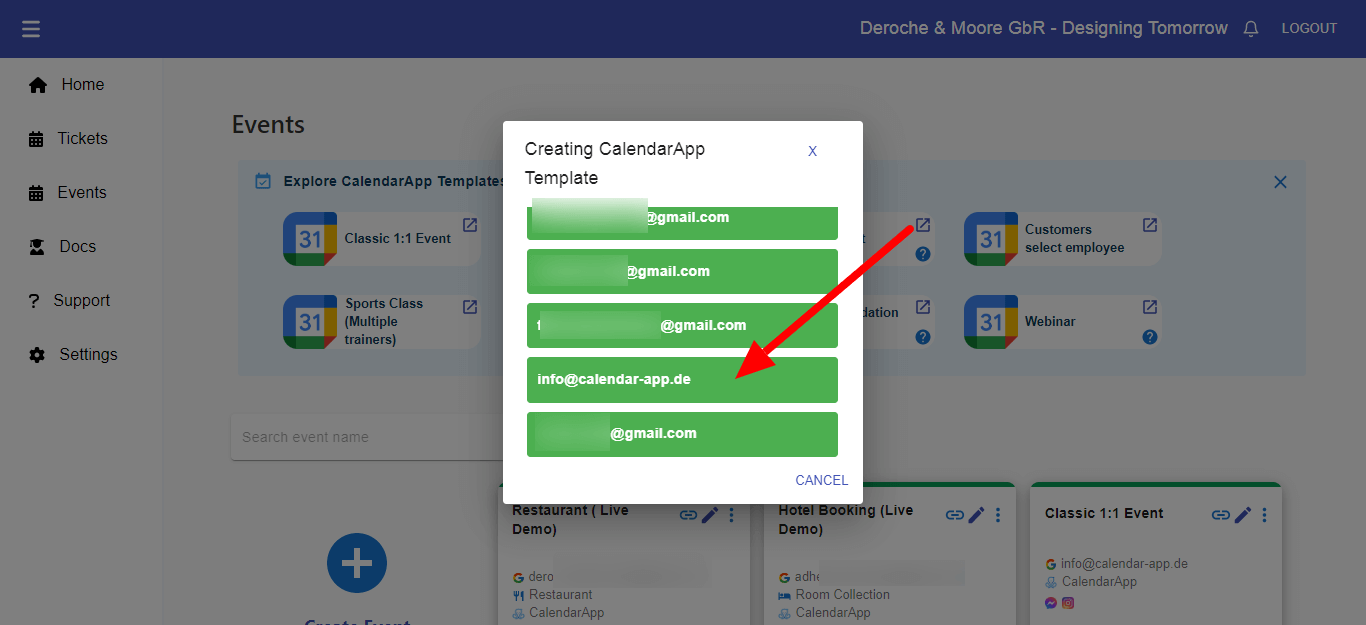
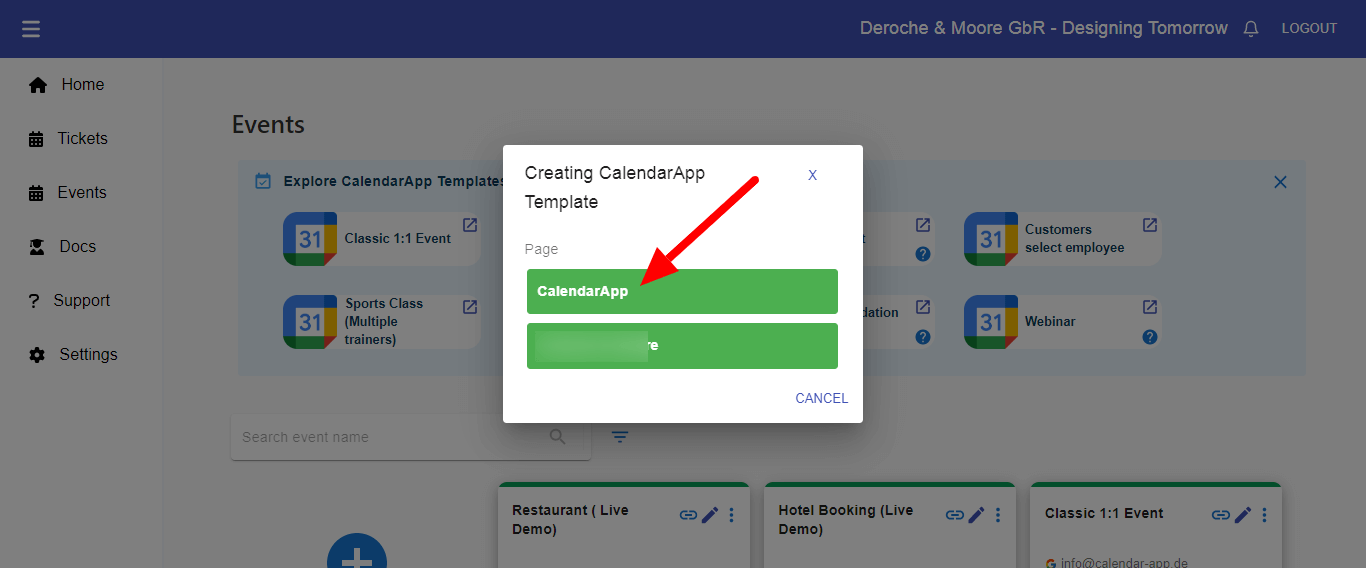
3. Create CalendarApp Event Using a Template
After you have successfully added your client’s manychat page and Google Account to your CalendarApp account you can start creating events on your client’s behalf. The easiest and fastest way of doing so is using one of our CalendarApp Event Templates.
For the purposes of this article we are using a the Classic 1:1 Event Event Template. This way a customer can book a 1:1 appointment with your client at the available hours.
Awesome! You have successfully connected your client’s Manychat page and Google Calendar to your CalendarApp account.
Finally, you can work on adjusting the created event to your client’s needs by following the instructions on the article about the CalendarApp Classic 1:1 Event.
In case the Classic 1:1 Event Event Template doesn’t fit your client’s use case you can also pick from the following templates:
Group Event
Restaurant
Customer Selects Employee
Sports Class (Multiple Trainers)
Accommocation (Airbnb)
Accommodation (Hotel)
Webinar
If you have any questions on how to manage your client’s account or how to utilize the CalendarApp Event templates do not hestitate to submit a support ticket.