
CalendarApp and Google Calendar
The Google Calendar is with hundreds of millions of users worldwide the most popular online calendar.
It’s main selling points are the free usage, as well as the very intuitive usability. The CalendarApp also uses the Google Calendar to create, change and save your bookings and reservations.
But how can you view or change your bookings?
To use the CalendarApp effectively, you need to be familiar with Google Calendar. In the following, you will learn how to work with Google Calendar in a targeted manner.
Below, we’ll use a restaurant as an example and take a close look at how a restaurant owner can make the most of the Google Calendar. However, this guide is also very helpful for other industries and use cases such as webniars, restaurant bookings, and hotel or Airbnb reservations, hairdresses, yoga and gym studios, real estate agents and much more or for private use.
For this reason, we have put a focus on reducing the complexity to a minimum making it very intuative to use even for first time users.
You will be surprised by yourself how fast you become very familiar with the Google Calendar.
For the following article you will not need an automated booking software like the CalendarApp. However, if you are a professional that wants to take your business to the next level sign up for the CalendarApp for free!
Table of Contents
1. Create a Google Account
To use Google Calendar, you need to have a Google account. If you already have a Google account, sign in, open the Google Calendar application and proceed to step 2 (Create Calendar). To create a Google account:
- Click on this link https://accounts.google.com/signup/v2/webcreateaccount?flowName=GlifWebSignIn&flowEntry=SignUp&hl=de
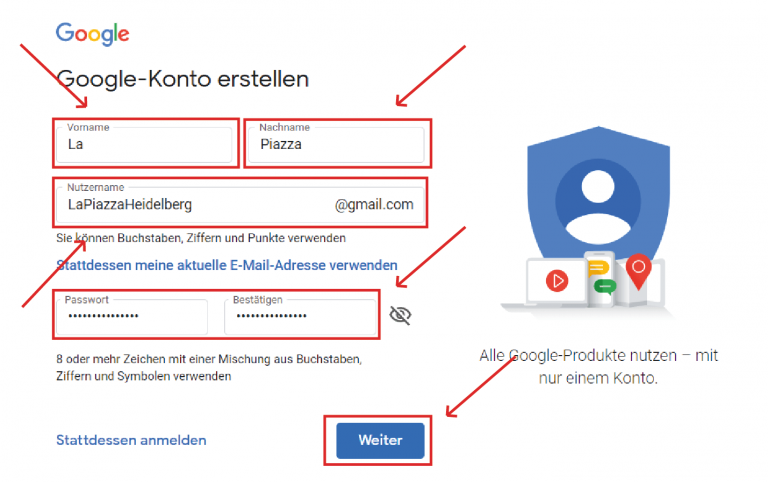
- Add your first and last name. Feel free to use the name of your restaurant.
- Create a username. This will be your future email address with the addition “@gmail.com”.
- Choose a secure password.
- Click on continue.
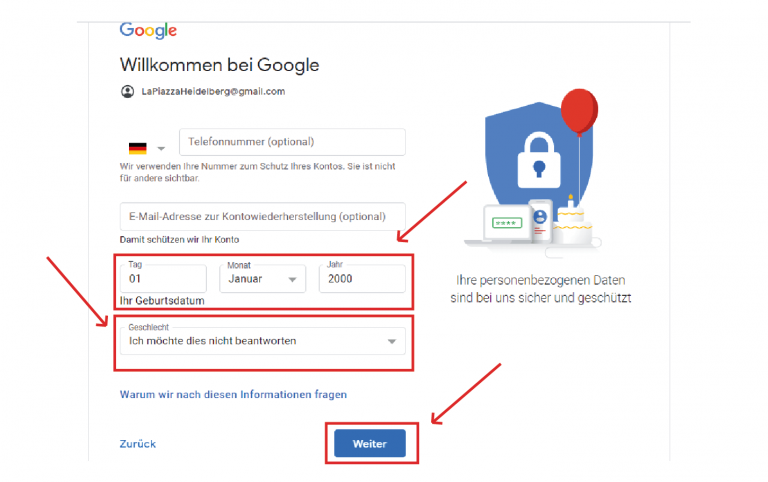
- After that, enter a date of birth and your gender.
- Click next again.
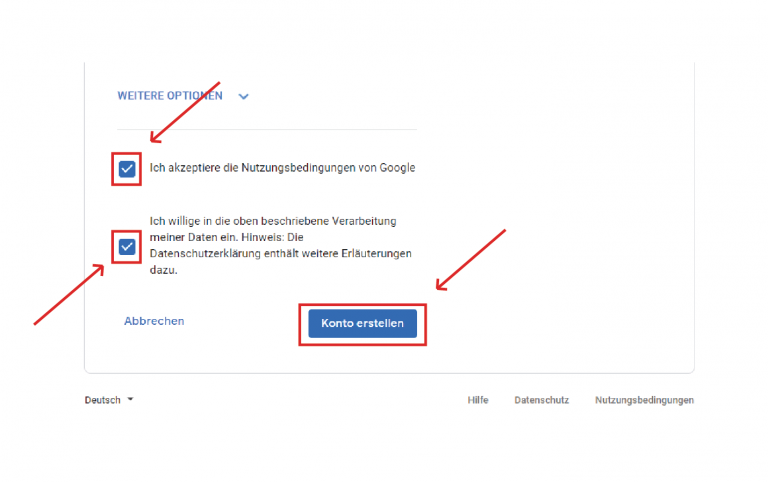
- Accept the terms of use and the privacy policy.
- Finally click on create account.
2. Create a Google Calendar
By default, the Google Calendar already already creates calendars for you. However, for a great booking experience, we use calendars that we need to create first.
For a better overview, the CalendarApp works with three calendars:
- 1 calendar for your reservations/bookings
- 1 calendar for your cancellations (optional)
- 1 calendar for your opening hours (optional)
In case you use one of our CalendarApp Event Templates those calendars will be automatically created for you.
To create a new calendar:
- click on the plus icon next to “more calendars”.
- Select “create new calendar”.
- Give the calendar a name. I use the name ” Online Reservations”.
- Add a description if needed
- Click on create calendar

A few seconds later your calendar has been created. Click on the arrow in the upper right corner to return to the calendar overview.
Repeat these steps for the calendars named ” Online Reservations – Cancellation” and ” Online Reservations – Opening Hours”.
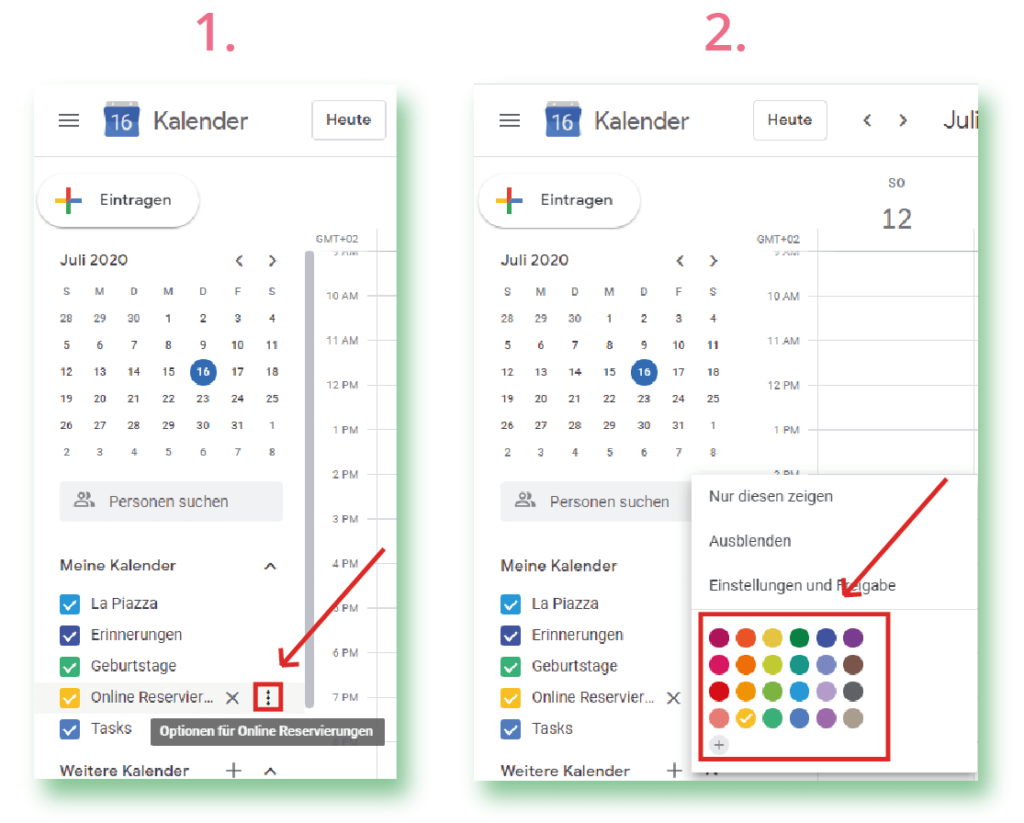
Under “My calendars” you will see an overview of the calendars you have created. If necessary, you can change the color of the calendars.
This is how you can change the colors of the calendars:
- move the mouse over the calendar whose color you want to change
- click on the 3 dots
- choose the color from the color palette
Also read our blog post on how to change the color of your Google Calendar.
3. Add and Delete Calendar Appointments
This is how you can add events to your Google Calendar:
- click on “+ Add” in the upper left corner.
- choose a title for the event
- select the start and end date
- Add an appointment to the calendar
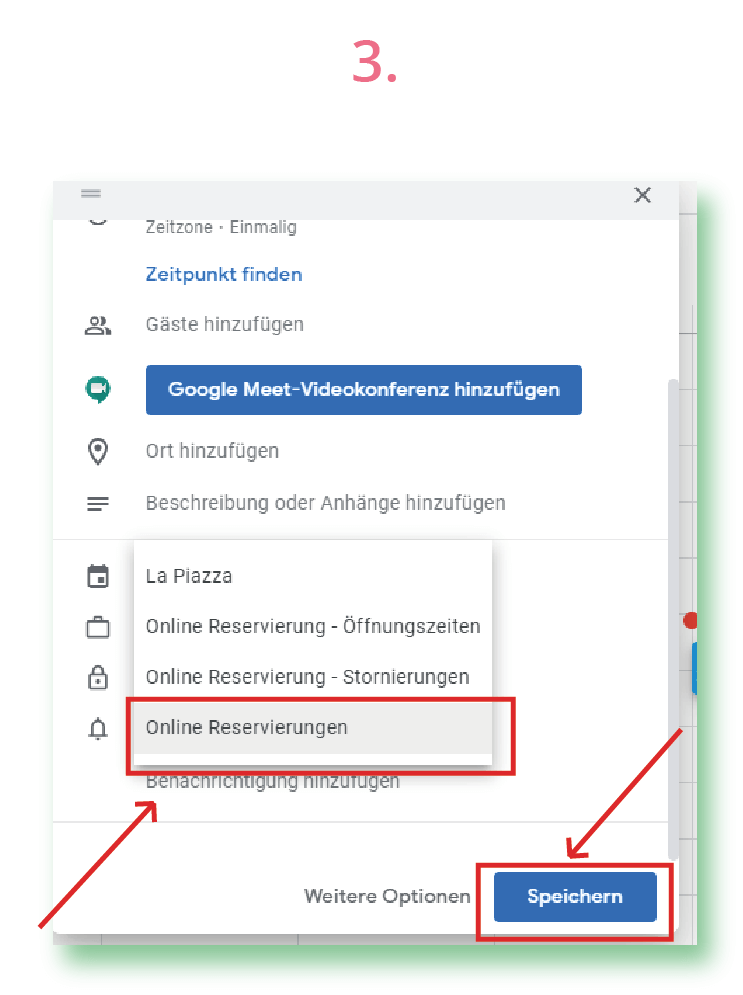
- choose the right calendar. For our case I select ” Online reservations”.
- click on “Save
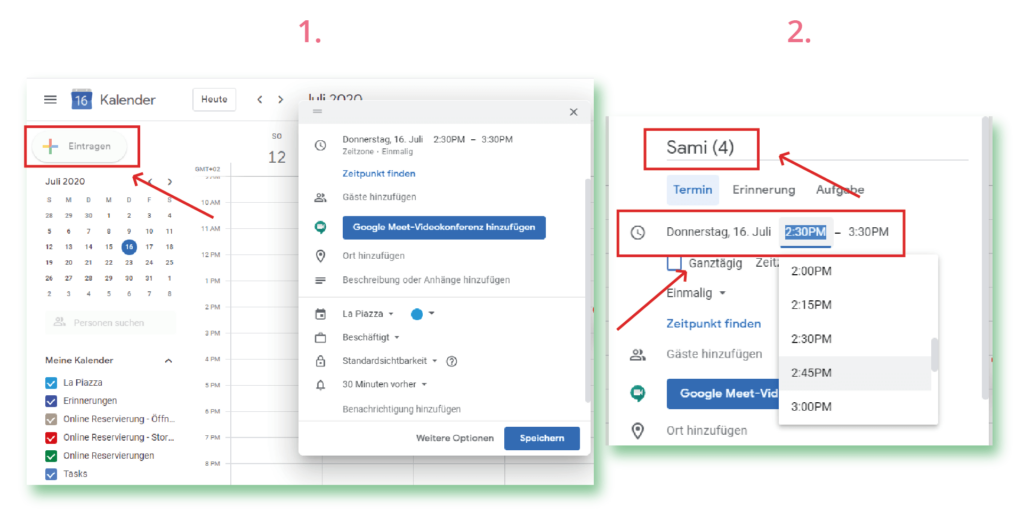
Instead of step 1 you can also click on the (free) area in your calendar e.g. 12: 00 PM. The Google Calendar will then select this time as the starting point for the appointment.
You can add an appointment manually using the steps explained above. However, this is not necessary when using the CalendarApp.
If a guest books a table in your restaurant, the CalendarApp will automatically create the booking in your Google Calendar.
4. Move/Reschedule Calendar Appointments
This is how you can move appointments in Google Calendar.
- long click or tap on the appointment you want to change
- you can now drag and drop the appointment as you like.
If a guest communicates with your Social Media page (eg. Instagram, Whatsapp) the CalendarApp will reschedule the existing booking. Again, no manual work is necessary.Everything happens 100% automated.
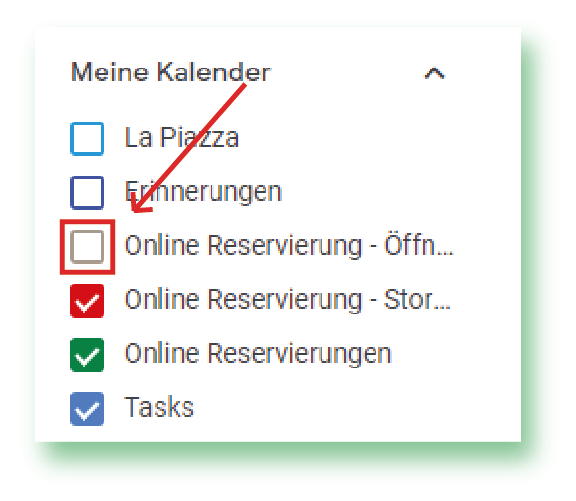
5. Show and Hide Your Google Calendar
Each Google Calendar for your reservations, cancellations and opening hours are clearly separated by color.
To have a better overview, it can be helpful that only the reservations are displayed. For this you can show and hide the other calendars (cancellations, opening hours) if needed.
This is how you can move appointments in Google Calendar.
- Decide which calendars you want to show or hide.
- Remove the checkmark next to the calendar you want to hide
- Set the checkmark next to the calendar to make bookings visible.
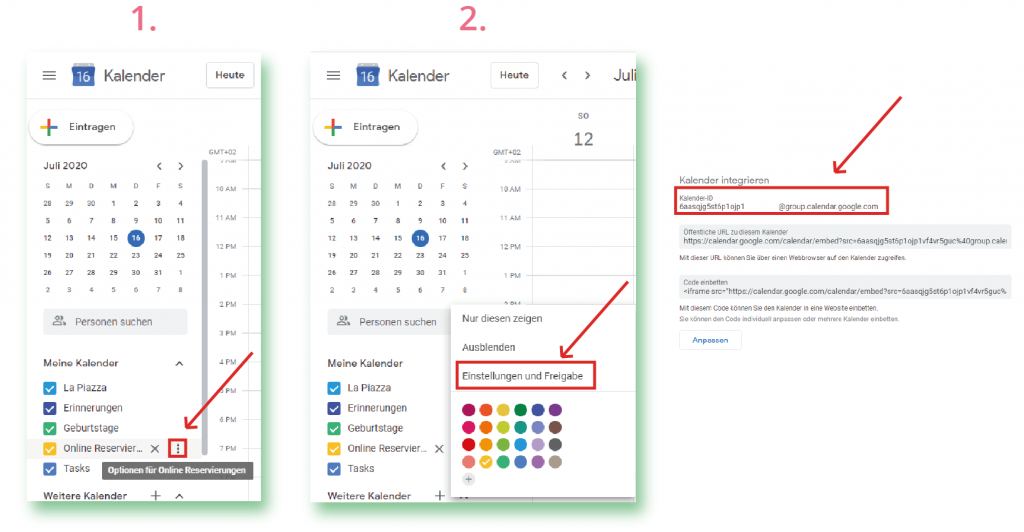
6. Integrate, Embed and Share Your Google Calendar With Friends and Collegues
Additionally, you can integrate your calendar as you wish, e.g. on your website or share it with your friends or collegues.
An integration is also necessary for the use of the virtual reservation. For the setup we need the link to your calendar.
Here’s how to share, integrate, or embed your calendar:
- hover over the calendar you want to integrate, embed or share.
- click on the 3 dots
- click on “Settings and sharing”
- scroll down to the heading “integrate calendar
- with the help of the “Calendar ID” you can integrate and share your calendar
If you have any questions watch our video tutorial or submit a support ticket.